Preserve
How to Preserve Homemade Jerky and Snacks: Drying, Vacuum Sealing and Shelf Life
By Editorial Team. Updated . 19 min read. 2 recipes, each under 2 hours.
Store links may be affiliate links. We may earn a commission; it never changes what we recommend.
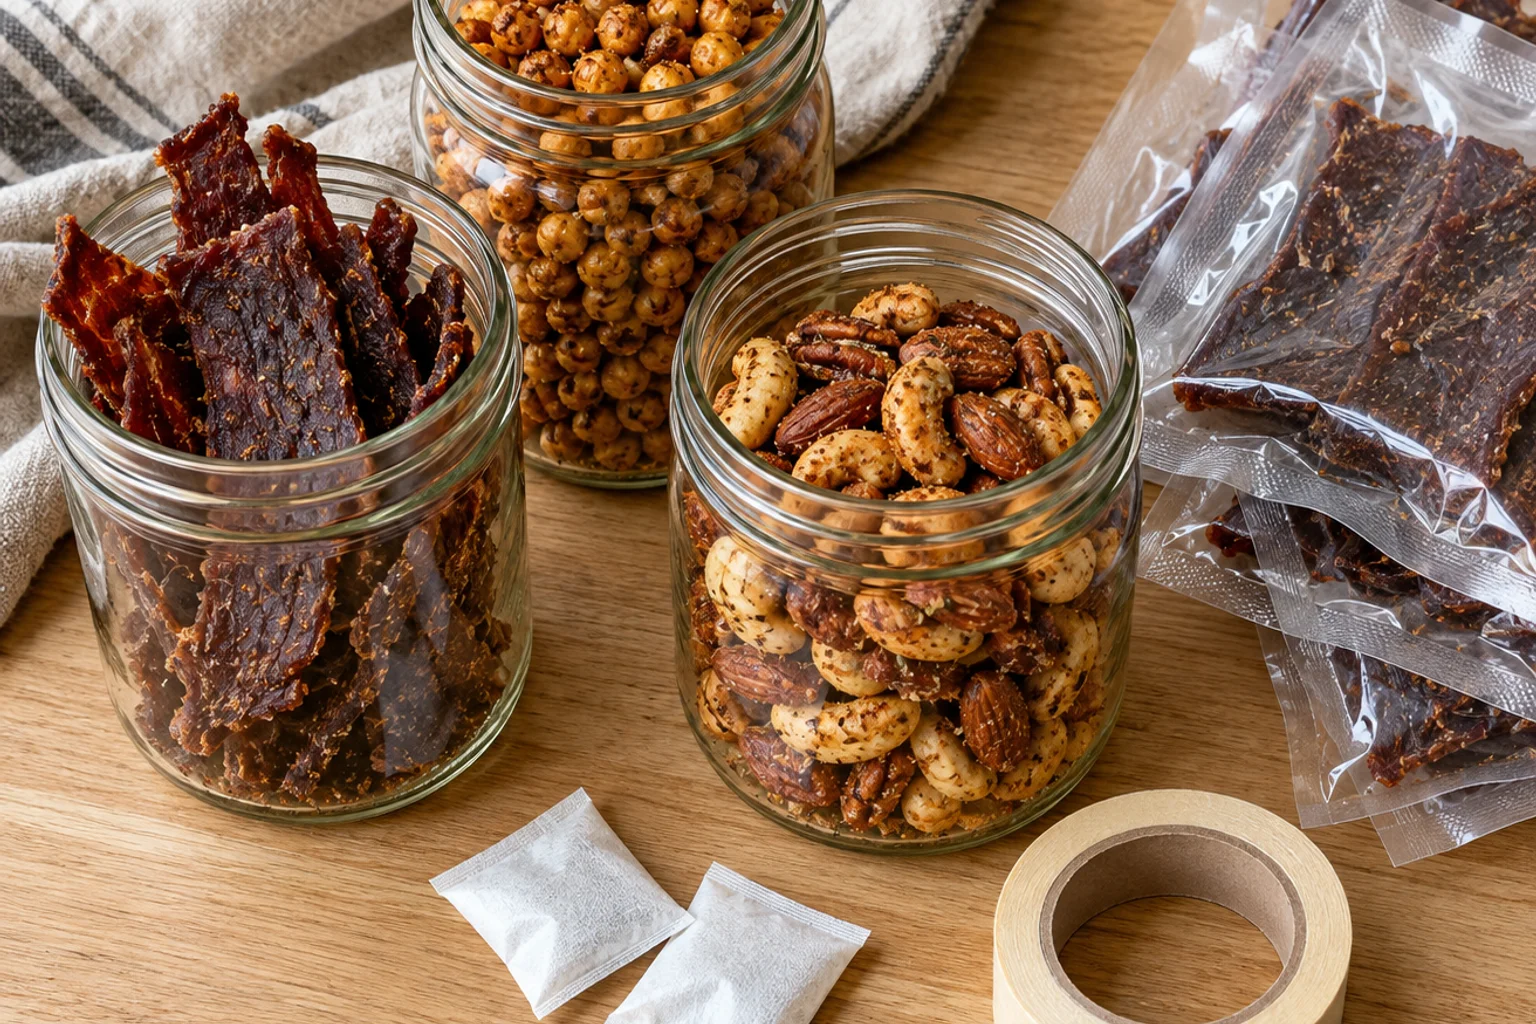
To preserve homemade jerky and snacks, control four things: moisture, oxygen, temperature and light. Fully dried jerky, roasted chickpeas and nuts keep about 1–2 weeks or more in a sealed jar in the pantry. Soft snacks such as egg bites, yogurt bark and muffins need the fridge or freezer, even when vacuum sealed.
Key takeaways
- Bacteria generally need a water activity above about 0.91 to grow and molds above about 0.80. Commercial jerky, guided by USDA FSIS, targets 0.85 or lower. Home cooks cannot measure it, so use the bend test and conservative storage.
- Drying only preserves meat if you first heat it to 160°F (71°C) for beef and pork, or 165°F (74°C) for poultry, before or at the start of drying.
- Vacuum sealing and oxygen absorbers slow rancidity and mold, but neither replaces refrigeration for perishable foods.
- Freezing at 0°F (−18°C) keeps food safe indefinitely. Time limits are about taste and texture, and nuts, seeds and fatty jerky keep best frozen.
- Do not home-can meat, beans or other low-acid snacks. Without a tested pressure-canner recipe, botulism is a real risk.
- Label every container with a name and date, and eat the oldest first.
Why do homemade protein snacks spoil?
Homemade protein snacks spoil because of four conditions: moisture, oxygen, temperature and light. Every preservation method works against one or more of them, so once you know which one threatens a snack, the right container and the right shelf follow. Microbes are controlled by these four, not a separate factor.
Moisture lets microbes grow and makes crisp snacks go soft. It is the biggest factor, and the next section covers how it is measured.
Oxygen reacts with fats and turns them rancid. Nuts, seeds, nut butters and fattier meats are affected most, and oxygen also feeds molds and many spoilage bacteria.
Heat speeds every spoilage reaction. The danger zone is 40–140°F (4–60°C), where bacteria multiply fastest. Perishable food should spend no more than 2 hours there, or 1 hour above 90°F (32°C). A fridge should run at or below 40°F (4°C) and a freezer at 0°F (−18°C).
Light, especially sunlight, speeds fat oxidation and fades color and flavor. A dark cupboard or an opaque Mylar bag beats a clear jar on a sunny shelf. Kill microbes with heat first, as in jerky, and you get a head start on the rest.
What is water activity, and how dry is dry enough?
Water activity (aw) measures how much of the water in a food is available for microbes to use. Pure water scores 1.0, dry crackers about 0.3. It is not the same as moisture percentage: honey is about 17% water but has a low water activity because sugar binds that water tightly.
| Water activity (aw) | What can grow | Example foods |
|---|---|---|
| Above 0.91 | Most bacteria, including dangerous ones | Fresh meat, cooked egg bites, yogurt, soft cheese |
| 0.88–0.91 | Many bacteria slow; yeasts can grow | Some soft cheeses, firm cooked foods |
| 0.80–0.88 | Most molds still grow | Soft, chewy jerky, moist dried fruit |
| 0.60–0.80 | Specialized molds and yeasts, slowly | Very dry jerky, nut butters, dense bars |
| Below 0.60 | Essentially no microbial growth | Crisp roasted chickpeas, nuts, crackers |
Commercial jerky is typically dried to an aw of 0.85 or lower and relies on salt, cure and packaging to stay stable. A lab meter takes those readings. Home cooks substitute three habits:
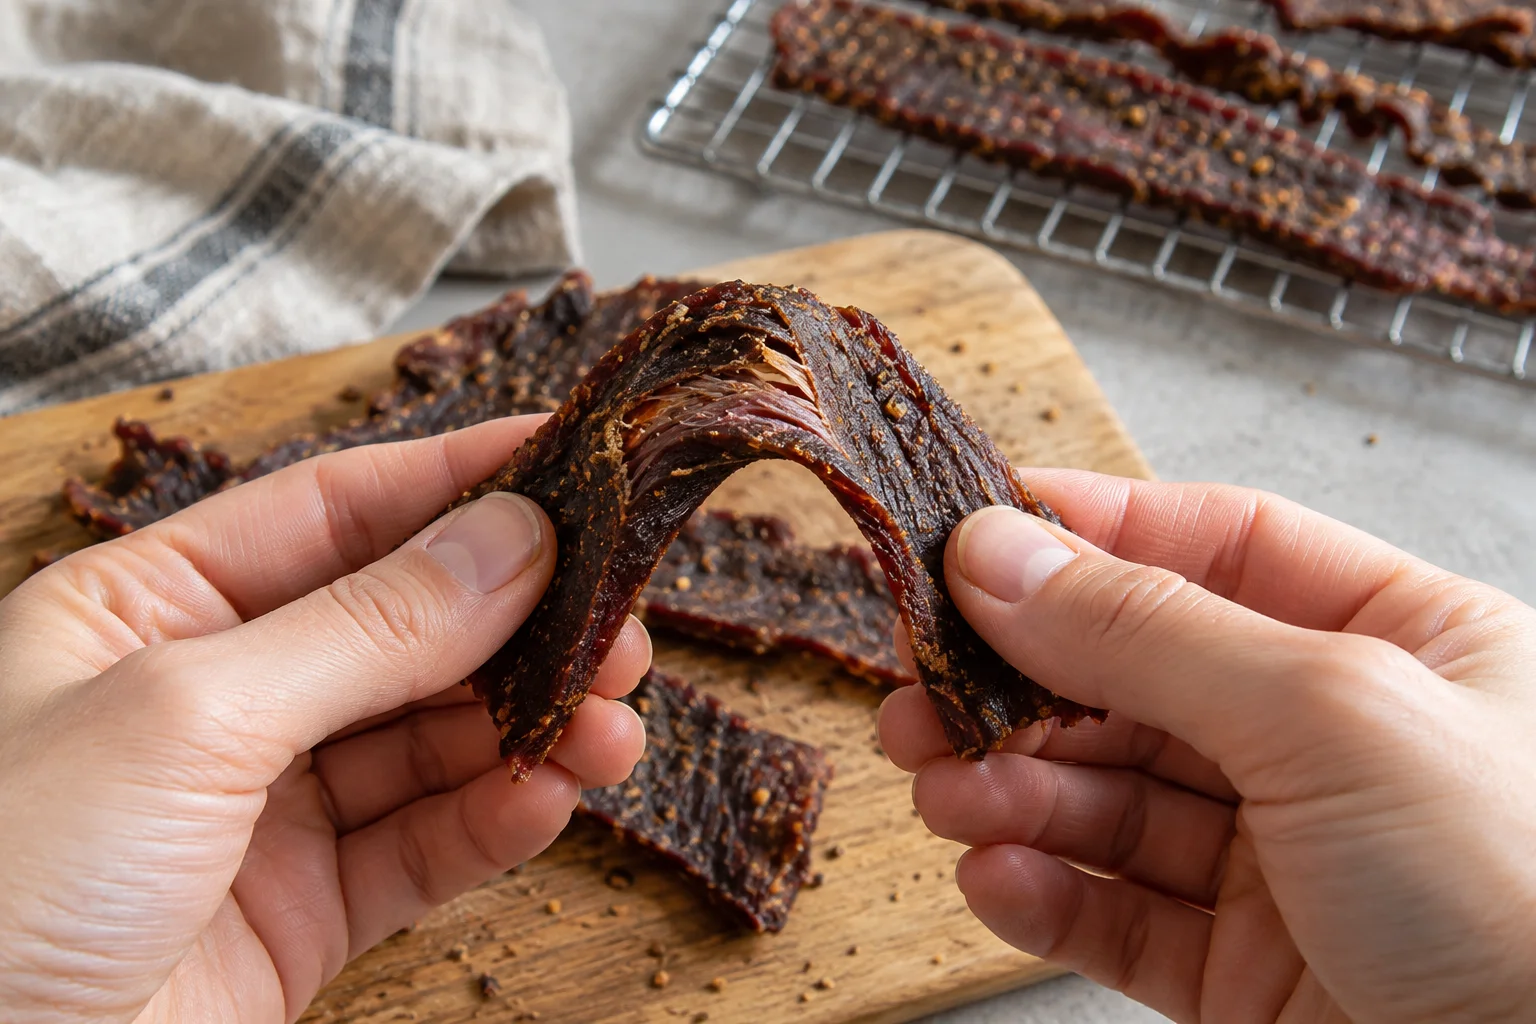
- The bend test. Jerky should crack but not snap when bent. Chickpeas and edamame should shatter when bitten, with no soft center.
- Conditioning. Resting dried food in a jar for a day evens out moisture (covered below).
- Conservative storage. If you are unsure a snack is dry enough, treat it as moist and refrigerate or freeze it.
A slightly under-dried snack in the fridge is fine. The same snack left in a warm pantry is how mold gets a start.
Which preservation method works for which snack?
Dehydrating suits jerky, chickpeas and fruit, freezing suits almost everything, and vacuum sealing or oxygen absorbers improve the quality of dry snacks without making perishable ones safe. The table compares the main options for the snacks in this series.
| Method | How it works | Best for | Main limits | Typical added shelf life |
|---|---|---|---|---|
| Dehydrating | Warm air removes water, lowering aw | Jerky, chickpeas, edamame, fruit | Meat needs a heat-to-temperature step; takes hours | Days to weeks (pantry), longer if frozen |
| Oven-drying | Same idea at low oven temp with door ajar | Jerky, chickpea crunch | Less even than a dehydrator; check often | Same as dehydrating |
| Curing (salt and nitrite) | Salt lowers aw; nitrite blocks botulism and holds color | Jerky, cured meat sticks | Must measure exactly; keep away from kids | Modest extra room-temp time and added botulism protection |
| Freezing | Cold stops microbial growth and slows oxidation | Almost everything | Texture loss on some items; freezer burn without good packaging | Months |
| Vacuum sealing | Removes air around food | Frozen foods, dry snacks, nuts | Does not prevent botulism risk in perishable foods; can crush soft items | Roughly doubles freezer quality time |
| Oxygen absorbers + Mylar | Chemical packet removes oxygen from a sealed bag | Dry nuts, jerky, crisp snacks | Dry foods only; needs a truly airtight bag | Weeks to months for quality |
| Desiccants | Silica gel absorbs moisture | Crisp snacks, seasoning-heavy snacks | Does not remove oxygen; food-safe packets only | Keeps crispness longer |
| Freeze-drying (home unit) | Ice sublimates under vacuum | Fruit, yogurt bites, cooked meat, egg bites | Costly machine; 20+ hours per batch; must be bone-dry | Long when stored with oxygen absorbers |
| Refrigeration | Cold slows growth | Perishable snacks | Days, not weeks | Days to 2 weeks |
| Home canning | Heat and sealed jars | Not for these snacks | Botulism risk in low-acid foods | Do not use |
Home freeze-dryers make very low-moisture food that stays stable for a long time, and they are popular for fruit and yogurt melts. But a freeze-dried snack that is not completely dry is just a perishable snack in a bag. If you own one, follow the manufacturer's dryness test and store the finished food with an oxygen absorber.
Quick decision guide
Ask these questions in order:
- Is the snack soft or moist, or does it contain eggs, dairy or cooked meat that is not dried? Use the fridge or freezer, and the 2-hour rule at room temperature. Vacuum seal after pre-freezing for a longer freezer life.
- Is it fully dried, such as jerky, chickpeas, edamame, nuts or crisp chips? Condition it, then pack it in a jar or bag, with an oxygen absorber for fatty or long-term items or a desiccant for crisp ones.
- Is it high in fat, like nuts, seeds or fatty meats? Prefer the freezer for anything beyond a few weeks.
- Are you thinking of canning it? Dry it or freeze it instead.
Can you can homemade jerky or protein snacks?
No. Meat, poultry, fish, eggs, beans and most mixed snacks are low-acid foods, and low-acid food sealed in a jar is the setting where Clostridium botulinum spores grow and make botulism toxin. You cannot see, smell or taste it. Canning is the one method to skip for protein snacks.
The only safe way to can low-acid foods is in a pressure canner, using a recipe tested for that food and jar size. The National Center for Home Food Preservation publishes those tested recipes. Boiling-water-bath canning is not enough for low-acid foods, and "oven canning" or heat-and-flip jar sealing is unsafe. Nothing in this series needs canning: dried snacks live in dry containers, and moist ones live in the fridge or freezer.
How do you dry jerky safely before storing it?
Dry jerky safely by heating the meat to a safe internal temperature first, then drying it until it cracks without snapping. Drying alone is risky: warm air at 130–140°F (54–60°C) can take hours to reach the center of a strip, and Salmonella and E. coli O157:H7 can survive on raw meat that dries slowly.
USDA FSIS recommends heating meat to 160°F (71°C) for beef and pork, or 165°F (74°C) for poultry, before or at the start of drying. You can steam or roast the strips first, simmer them in the marinade, or start them in a hot oven. Then dry at a steady 130–140°F (54–60°C) minimum until the strips are dry. Our 2-hour express beef jerky uses a hotter oven (170–200°F, 77–93°C) and verifies the internal temperature with a thermometer, so the heat step and the drying step overlap.
Dehydrator temperature advice conflicts online, with figures from 145°F to 185°F. The two jobs differ. The 160°F or 165°F heat step kills pathogens, and the lower drying temperature only removes water. If your dehydrator cannot reach pathogen-killing temperatures, do the heat step in the oven or marinade first, and follow FSIS and NCHFP rather than a machine's manual.
- Start with lean, cold meat. Trim visible fat, because fat turns rancid first and shortens shelf life.
- Slice evenly, about 1/8 to 1/4 inch (3–6 mm), so strips dry at the same rate.
- Marinate in the fridge, never on the counter. Discard used marinade or boil it for at least 1 minute before reuse.
- Heat to 160°F (71°C) for beef or 165°F (74°C) for poultry with a steam, simmer or hot-oven step. Check with an instant-read thermometer (shop at Amazon, opens in a new tab).
- Dry in a food dehydrator (shop at Amazon, opens in a new tab) at 130–140°F (54–60°C), or in an oven set as low as it will go with the door propped open about an inch, strips on racks so air reaches both sides.
- Cool a piece for 5 minutes, then bend it. It should crack without breaking apart. Pat off any beads of fat.
- Condition and package as described below.
Is curing salt necessary for jerky?
Curing salt is optional for jerky. Curing salt #1 (Prague powder #1, 6.25% sodium nitrite) adds a pink color, a cured flavor and extra protection against botulism if the jerky is dried at low temperatures or stored in low-oxygen packaging. The heat step, not the cure, is the main safety measure.
The rate is 1 level teaspoon per 5 lb (2.3 kg) of meat. Never eyeball it, never use curing salt #2 for jerky, and keep it away from kids. Buy curing salt #1 (shop at Amazon, opens in a new tab) from a reputable source and store it labeled in a closed container. Cure does not replace the heat step, and if you skip it, store jerky more conservatively (see the shelf-life table).
How do you condition dried jerky and snacks?
Conditioning means resting cooled, dried food in a loosely filled jar for a day or more so moisture evens out between pieces. After drying, some pieces are drier at the edges and others moister in the middle, and moisture moves from wetter pieces to drier ones when they share a container.
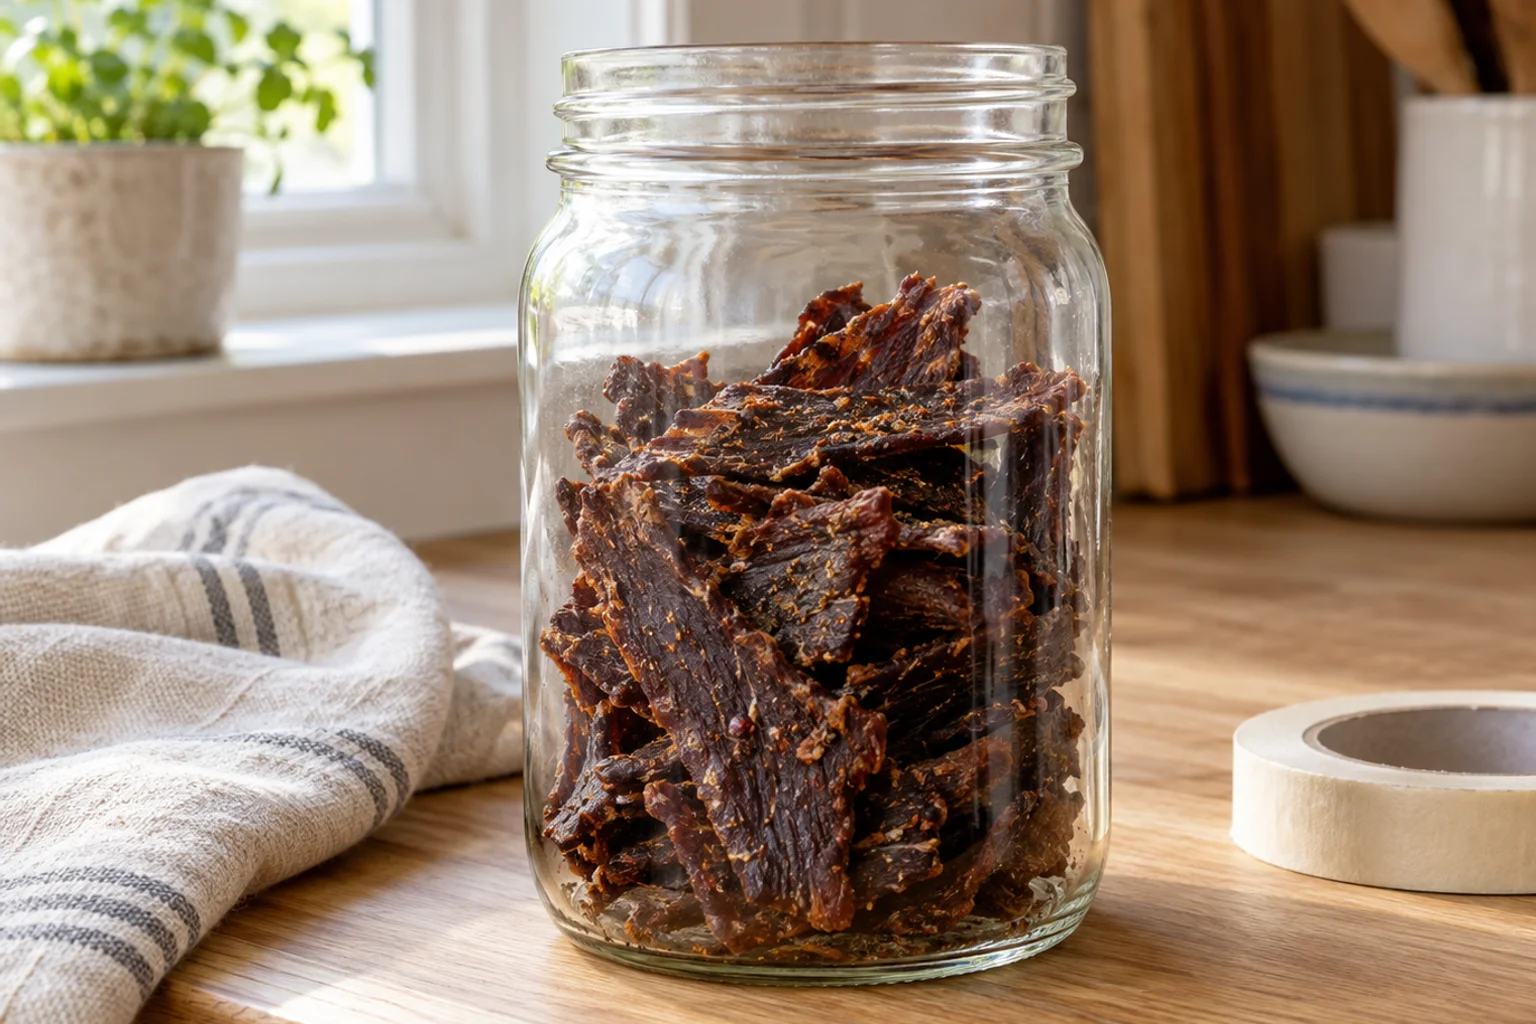
Cool the food completely, then pack it loosely into a wide-mouth mason jar (shop at Amazon, opens in a new tab) about two-thirds full. Cap the jar and shake it once a day for 4–7 days, as the National Center for Home Food Preservation recommends for dried fruit and vegetables. For jerky, 24 hours is a practical minimum. Signs the food is still too moist:
- Condensation on the inside of the jar
- Pieces sticking together or feeling tacky
- Any visible mold, which means the entire jar goes in the trash
If you see condensation, return the batch to the dehydrator or oven for another 30–60 minutes and condition again.
How do you dry chickpeas, edamame and other plant snacks?
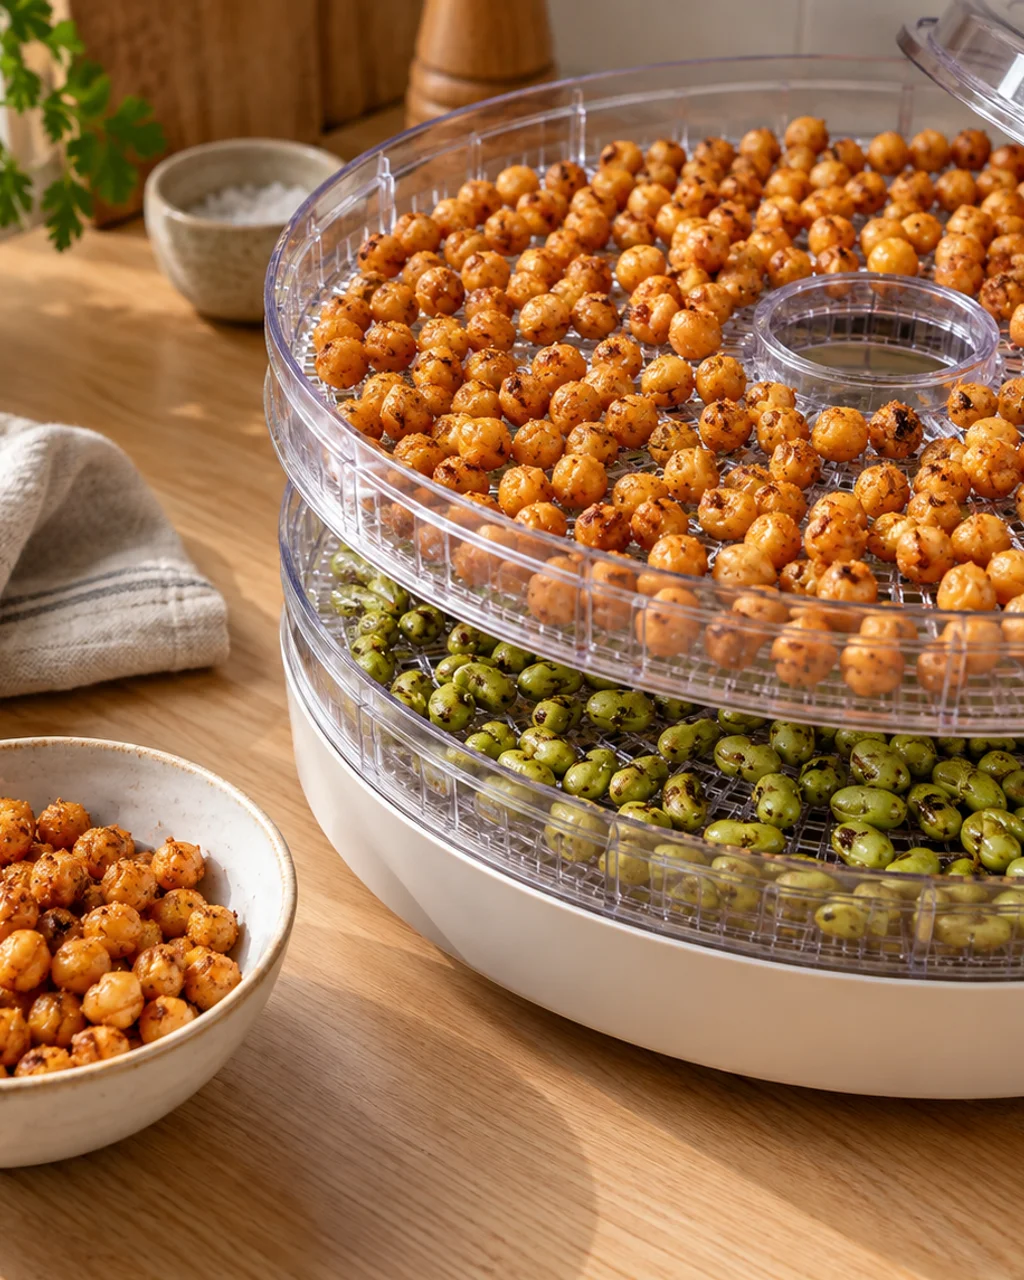
Dry plant snacks by removing surface water first, roasting until crisp, then finishing in a cooling oven or dehydrator so the centers dry out. Plant snacks do not need a pathogen-kill heat step the way raw meat does, but they must be dry all the way through. A roasted chickpea with a damp center molds in a closed jar within a day or two.
- Drain and rinse canned chickpeas, then pat them completely dry with a clean towel and rub off loose skins.
- Air-dry them on the towel for 15–20 minutes, because surface water makes steam and steam makes chewy chickpeas.
- Toss with a little oil and salt, spread in a single layer, and roast at 400°F (200°C) for 25–35 minutes, shaking the pan every 10 minutes.
- Turn the oven off and leave the pan inside for 30 minutes with the door cracked.
- Cool fully before sealing in a container.
In a dehydrator at 135°F (57°C), pre-roasted chickpeas finish drying in 2–4 hours. For edamame, use shelled frozen edamame, thawed and dried well, then roast at 375°F (190°C) for 30–40 minutes or dry at 135°F (57°C) for 4–6 hours. Edamame holds more moisture than chickpeas, so test a piece from the middle of the pan. Our plant-based protein snacks guide has more recipes that store well.
The quick test for any crisp snack: cool one piece completely, bite it, and look at the center. If it is anything but dry and crunchy, it goes back in.
Can you vacuum seal jerky and keep it in the pantry?
Vacuum-sealed jerky can stay in the pantry only if it is fully dried and, ideally, cured. A vacuum sealer (shop at Amazon, opens in a new tab) removes most of the air from a bag, which slows rancidity and keeps dry snacks from absorbing odors and humidity. In the freezer it prevents freezer burn, so food keeps its quality roughly two to three times longer than in a thin freezer bag.
Vacuum sealing does not make perishable food safe at room temperature. Removing oxygen stops some bacteria and helps others. Anaerobic bacteria, including Clostridium botulinum, thrive without oxygen, so a vacuum-sealed egg bite or piece of cooked chicken left on the counter is not safe. A sealed perishable item in the fridge keeps the same time limit as an unsealed one, and cold-tolerant bacteria such as Listeria are a reason to be stricter. For low-acid meat, follow the USDA FSIS jerky guidance (opens in a new tab), and refrigerate or freeze sealed jerky if you are unsure it is dry enough.
How to vacuum seal snacks
- Pre-freeze soft or moist items. Egg bites, protein balls, soft bars and yogurt bark get crushed or release liquid that ruins the seal, so freeze them solid on a tray for 1–2 hours, then bag them.
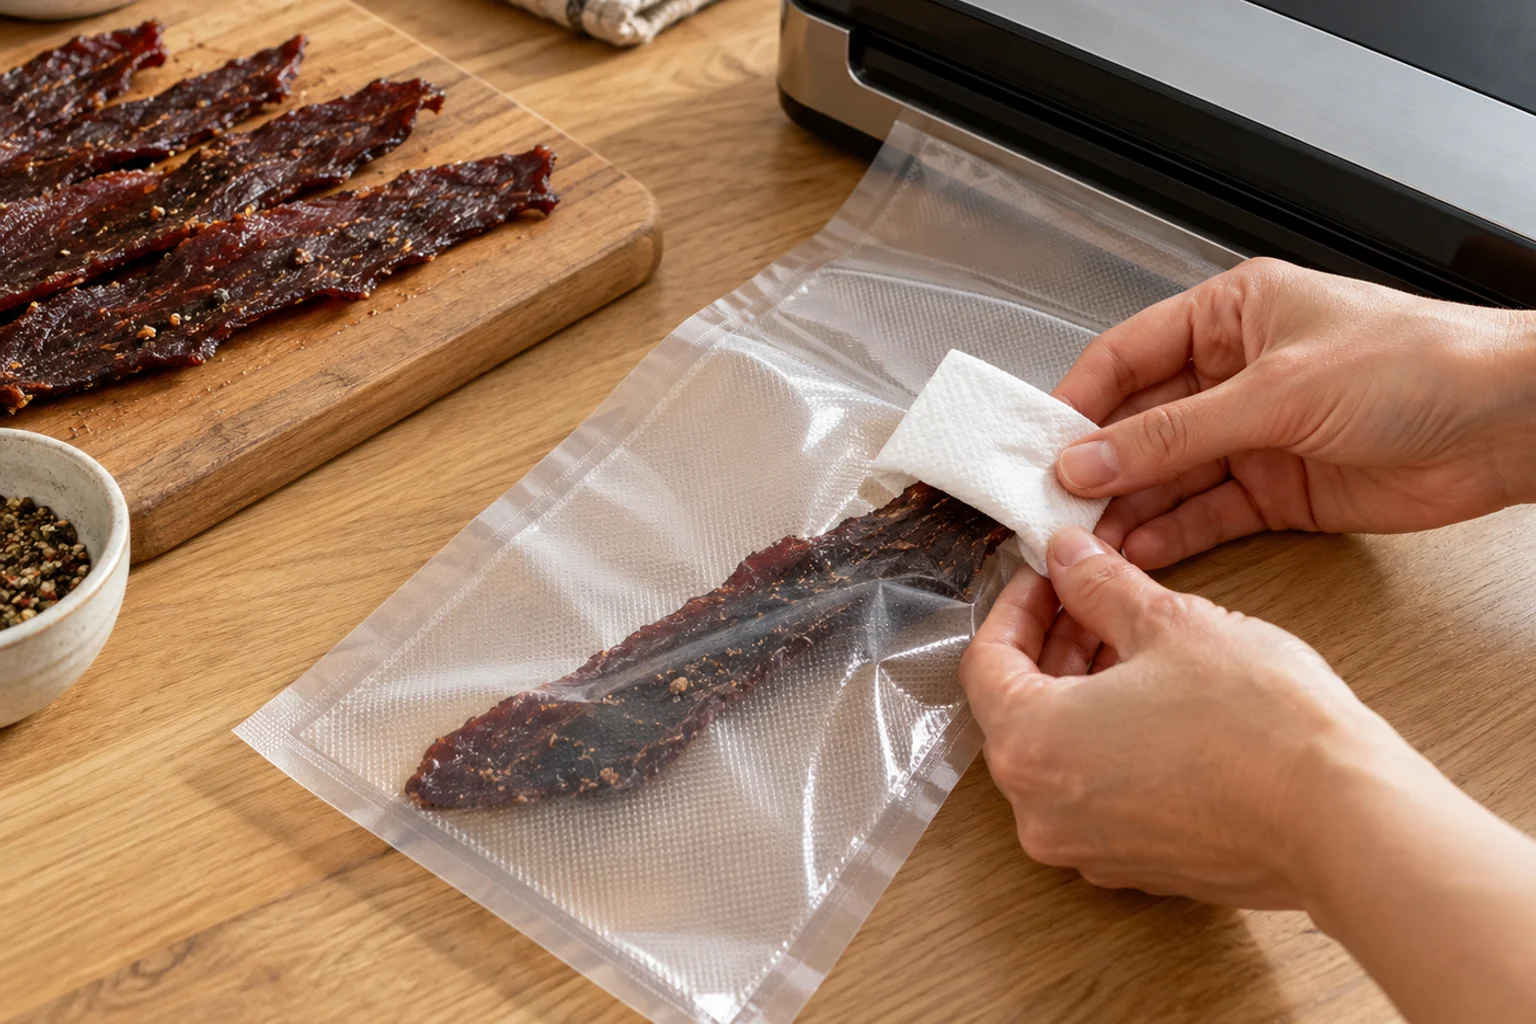
- Protect against sharp edges. Dried jerky strips and hard chips can poke holes in the bag, so fold a small piece of paper towel over sharp ends or tuck points inward.
- Leave 3 inches (7.5 cm) of space at the top of the bag so the seal bar has clean plastic to work with, and wipe the seal area dry.
- Use proper vacuum sealer bags (shop at Amazon, opens in a new tab), not thin zip bags. Seal, then check that the seal is flat with no wrinkles.
- Portion first. Bag single servings so you open only what you need, because each opening resets the clock.
- Label and date every bag before it goes in the freezer or pantry.
Do you need oxygen absorbers or desiccants for jerky?
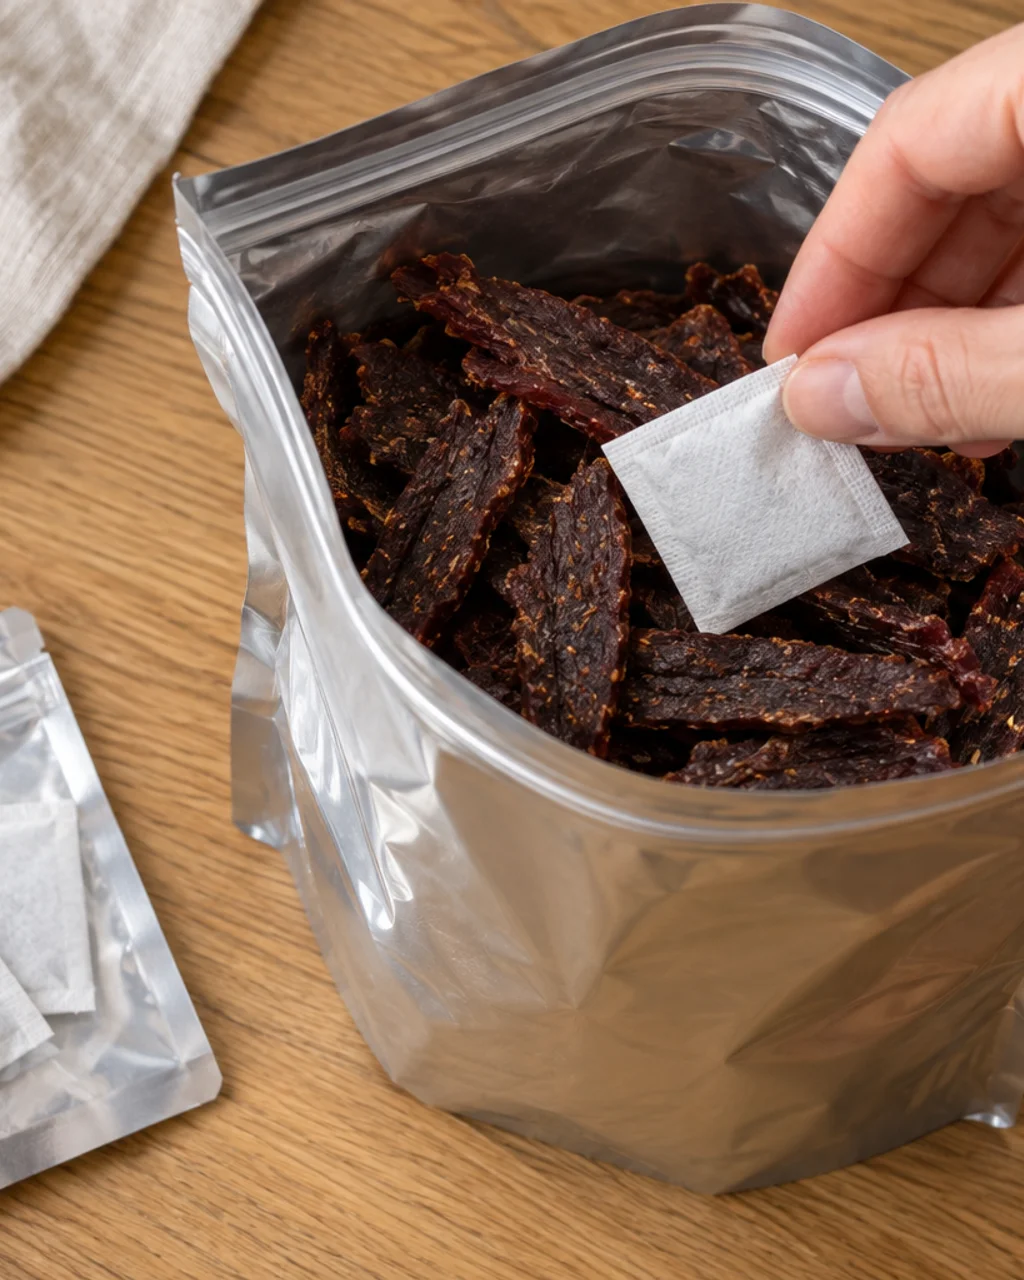
Oxygen absorbers help jerky, nuts and other dry, fatty snacks keep longer, but they belong only in sealed containers of food that is already dry. An oxygen absorber is a small packet of iron powder that reacts with oxygen and pulls it out of a sealed container, cutting oxygen to below 0.1%. That slows fat rancidity and prevents most molds.
Oxygen absorbers (shop at Amazon, opens in a new tab) are for dry foods only: well-dried jerky, nuts and seeds, crisp roasted chickpeas and dry mixes. Do not use them with soft jerky, soft bars or anything with an aw above about 0.85, because a moist, low-oxygen package can favor anaerobic bacteria.
How many oxygen absorbers do you need?
Absorbers are rated in cc (cubic centimeters) of oxygen absorbed. Air is about 21% oxygen, so a container holds roughly 210 cc of oxygen per liter of air. Food takes up space, and the air left in the container is what you need to clear.
| Container | Approx. headspace air | Absorber size (cc) |
|---|---|---|
| Pint jar (16 oz / 0.5 L), full of snack | 100–200 mL | 50–100 |
| Quart jar (32 oz / 1 L), full | 200–400 mL | 100 |
| Quart Mylar bag, full | 200–400 mL | 100 |
| Gallon Mylar bag, full | 0.5–1 L | 300 |
When in doubt, size up: an oversized absorber is harmless, while an undersized one leaves oxygen behind. Absorbers start working the moment they meet air, so pull out only the number you need, reseal the rest right away, and have the bags or jars ready. Use resealable Mylar bags (shop at Amazon, opens in a new tab) or glass jars with tight lids. Mylar's opaque layer also blocks light that damages fats. In a sealed bag the walls draw in slightly over a few hours as oxygen is consumed. A jar will not visibly change, which is why bags are easier for first-timers.
When is a desiccant the better choice?
Silica gel food-safe desiccant packets (shop at Amazon, opens in a new tab) absorb moisture rather than oxygen. They suit crisp, low-fat snacks that go soft with humidity, like roasted chickpeas, cheese crisps and chicken chips, and seasoned snacks that clump. They do nothing for rancidity.
- Nuts, seeds and fatty jerky: an oxygen absorber, or the freezer.
- Crisp roasted chickpeas and edamame: a desiccant.
- Very dry jerky in long-term storage: an oxygen absorber alone, or both in a humid climate.
- Soft snacks: neither. Use the fridge or freezer.
Check that packets are labeled food-safe, keep them out of kids' reach, and never eat the contents.
Why do nuts and seeds go rancid?
Nuts and seeds go rancid because their unsaturated fats oxidize when exposed to air, heat and light. Walnuts, pecans, pine nuts, hemp hearts, flaxseed and sunflower seeds go off fastest. Rancid nuts taste bitter, paint-like or cardboardy. They are rarely dangerous in small amounts, but they taste harsh and have lost nutritional quality.
- Store them in the freezer. Shelled nuts keep their quality for 6–12 months frozen versus 1–3 months in a warm pantry.
- Use airtight containers, such as a glass jar or vacuum-sealed bag.
- If you must use the pantry, keep them dark and cool, away from the stove and sunny windows.
- Toast small batches, because toasting speeds oxidation. See the nut mix recipe below.
- Smell before you eat. Fresh nuts smell sweet and mild, and nuts that smell like old oil or crayons go in the trash.
Ground flaxseed, nut flours and nut butters are more vulnerable because grinding exposes more surface, so keep them in the fridge or freezer.
How long does homemade jerky last?
Properly dried homemade jerky lasts about 1–2 weeks at room temperature in an airtight container, 1–2 months in the fridge and about 6 months in the freezer. Published figures vary by source, so the table uses the conservative end. Where USDA FSIS or the National Center for Home Food Preservation advise less, follow them. These are quality guidelines, not guarantees.
| Snack | Room temp | Fridge (≤40°F / 4°C) | Freezer (0°F / −18°C) |
|---|---|---|---|
| Jerky, no cure | 1–2 weeks, airtight | 1–2 months | About 6 months |
| Jerky, with cure | 1–2 months, airtight | 3–4 months | 6–12 months |
| Roasted chickpeas | 3–7 days crisp, airtight | 2 weeks (may soften) | 2–3 months |
| Roasted edamame | About 1 week, airtight | 2 weeks | 2–3 months |
| Spiced nuts | 2–4 weeks, cool and dark | About 3 months | 6–12 months |
| Protein balls and bars | 2 hours; dry nut-based bars up to 1–2 days | 1–2 weeks | 2–3 months |
| Egg bites | 2 hours max | 3–4 days | 2–3 months |
| Chicken chips | 2 hours unless fully dry and crisp | 3–4 days | 2–3 months |
| Cheese crisps | 2–3 days, airtight | 1–2 weeks | About 2 months |
| Yogurt bark | 2 hours max | 1–2 days (softens) | 1–2 months |
| Muffins (protein) | 2 hours max | 4–5 days | 2–3 months |
The numbers assume snacks were made with fresh ingredients, cooled quickly, packed airtight and stored properly, and they draw on USDA, FoodSafety.gov and university extension guidance. Freezer times assume 0°F (−18°C), where food stays safe longer but quality drops. For the full fridge and freezer chart, see our guide to fridge and freezer storage for protein snacks.
- When in doubt, go cooler. Short room-temperature times apply to fully dry snacks, and anything soft or made with eggs, dairy or meat follows the 2-hour rule.
- Count from the day you made it, not the day you opened it.
- In a humid kitchen, shave time off the dry-snack numbers or add a desiccant.
- Reheating does not reset the clock. A perishable snack that spent more than 2 hours (1 hour above 90°F/32°C) in the danger zone gets thrown out.
How should you label and track stored snacks?
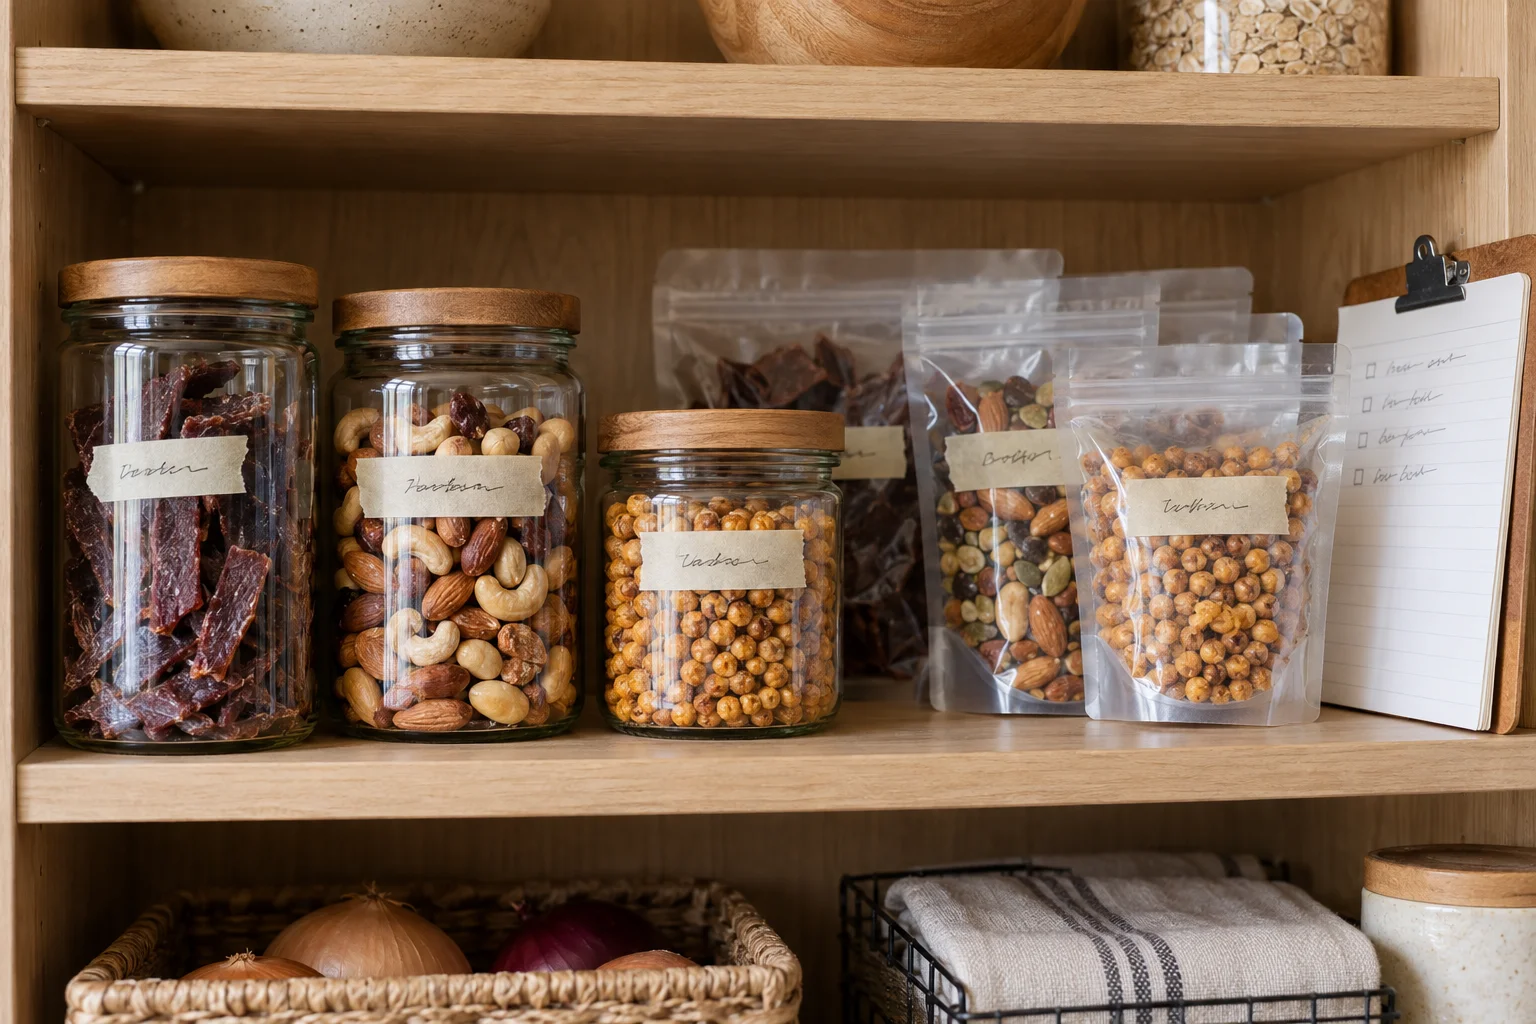
Label every container, bag and jar with the snack name, the date made and a use-by date from the table above. A freezer label (shop at Amazon, opens in a new tab) and a marker that does not smear work best. For vacuum bags, write on the label area before sealing.
Put new batches behind older ones and eat the oldest first. A running inventory on the fridge or in a phone note, listing the snack, quantity, date made, location and use-by date, is enough. Make quantities you can finish within the shelf life: a big batch of jerky is fine, but a big batch of egg bites you will not eat in four days goes in the freezer on day one. A cheap thermometer confirms your fridge is at or below 40°F (4°C) and your freezer at 0°F (−18°C), since many home fridges run warmer than the dial suggests. For ideas on what to stock, start with our build-your-own high-protein snacks guide.
Recipe: Shelf-Stable Spiced Nut Mix
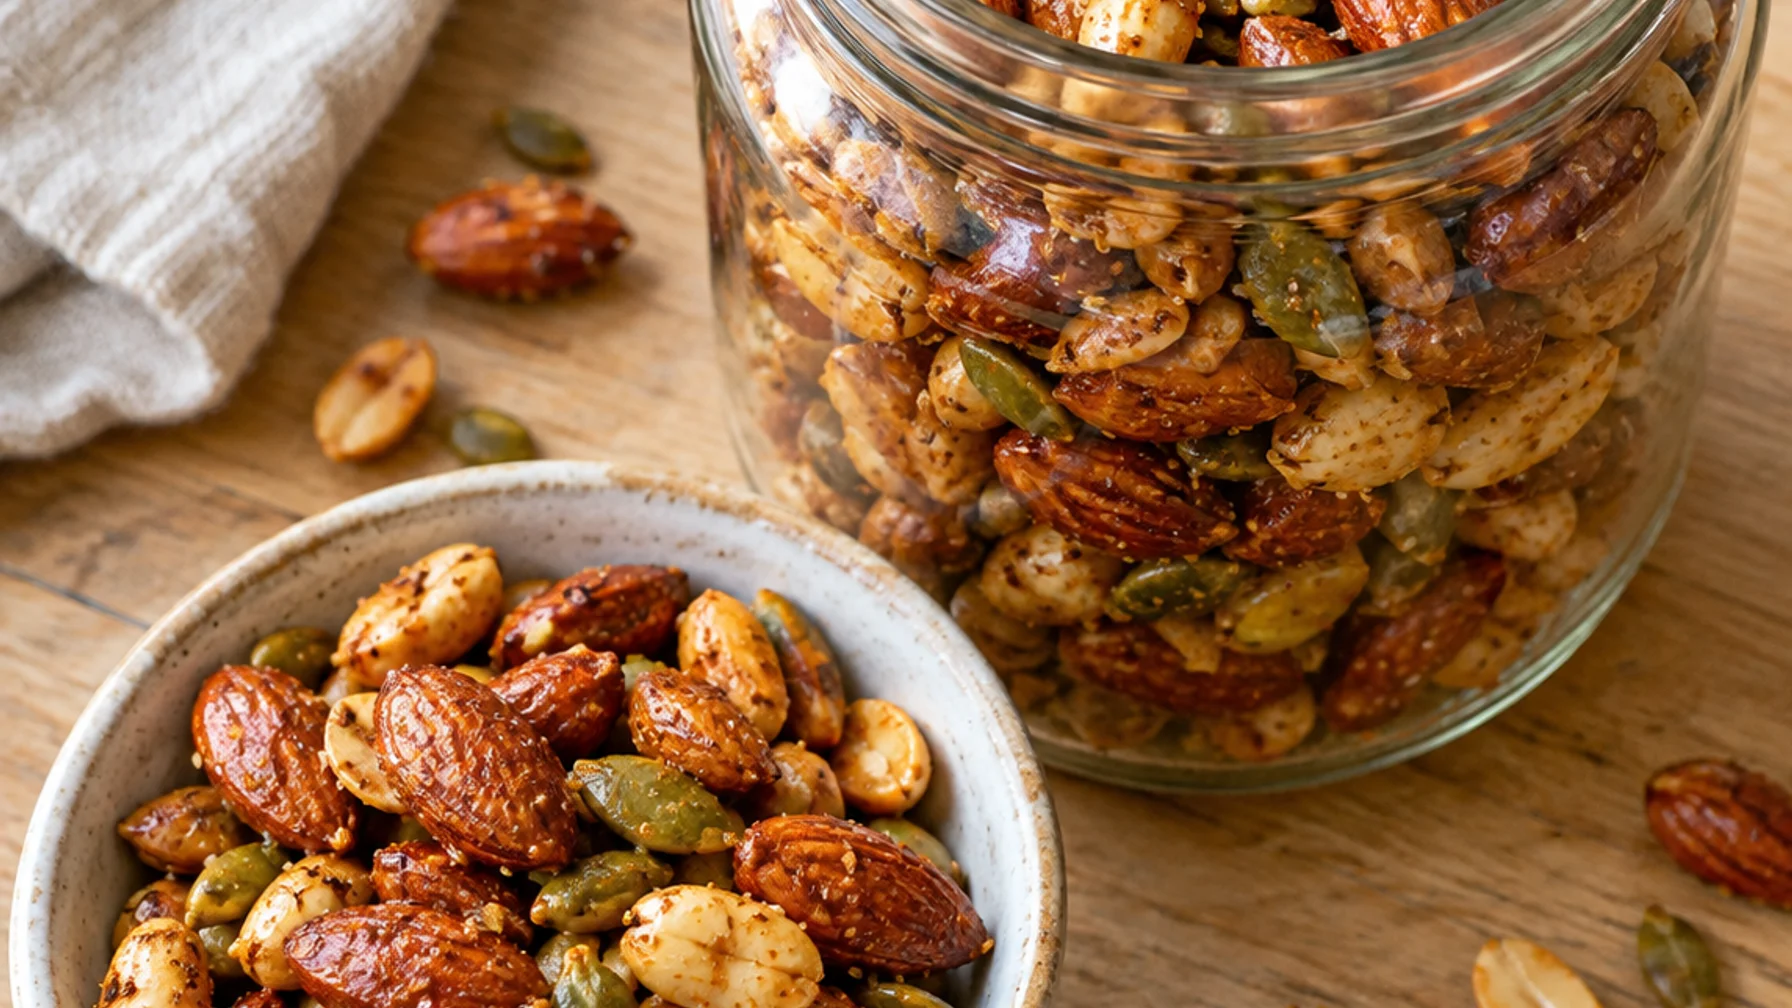
A small, low-moisture nut mix is one of the safest shelf-stable homemade snacks. This version uses no egg white or dairy, a minimal glaze and a low-and-slow bake so it dries fully. It keeps its crunch for 2–4 weeks in a sealed jar, longer in the freezer.
Recipe · Easy · gluten-free, dairy-free, vegan
Shelf-Stable Spiced Nut Mix
A dry-roasted almond, peanut and pumpkin seed mix with smoked paprika that stays crisp in a jar for weeks, with about 9 g protein per serving.
- Prep
- 10 min
- Cook
- 25 min
- Chill/set
- 30 min
- Total
- 1 hr 5 min
- Makes
- 10 servings (about 1/4 cup / 35 g each)
- Protein
- 9g
- Calories
- 220
- Carbs
- 8g
- Fat
- 18g
- Fiber
- 3g
- Sodium
- 180mg
Per serving, approximate.
Ingredients
- 1 cup (145 g) raw almonds (shop at Amazon, opens in a new tab)
- 1 cup (145 g) dry-roasted unsalted peanuts (shop at Amazon, opens in a new tab)
- 1/2 cup (60 g) raw pumpkin seeds (shop at Amazon, opens in a new tab)
- 1 tbsp (15 ml) extra-virgin olive oil (shop at Amazon, opens in a new tab)
- 1 tbsp (15 ml) pure maple syrup (shop at Amazon, opens in a new tab)
- 2 tsp smoked paprika (shop at Amazon, opens in a new tab)
- 3/4 tsp kosher salt (shop at Amazon, opens in a new tab)
Equipment
Steps
- Heat the oven to 325°F (165°C) and line a rimmed sheet pan with parchment paper.
- Toss the almonds, peanuts and pumpkin seeds in a large bowl with the olive oil, maple syrup, smoked paprika and salt until every piece is lightly coated.
- Spread the mix in a single layer on the pan and bake 20–25 minutes, stirring once at the 10-minute mark, until the seeds are fragrant and the almonds are golden inside when you cut one open.
- Remove from the oven and stir the nuts again while they are hot so the glaze does not pool and stick.
- Cool the pan on a rack for at least 30 minutes until the nuts are completely room temperature. Warm nuts trapped in a jar make steam and soften.
- Pack into a dry jar or Mylar bag, label with the date, and store in a cool, dark place.
Storage: Room temperature 2–4 weeks in an airtight jar in a cool, dark spot; fridge 3 months; freezer 6–12 months.
For a longer pantry life, skip the maple syrup (sugar attracts moisture) and add a desiccant packet to the jar. Walnuts and pecans taste great here but go rancid faster, so freeze them. Nutrition values are estimates calculated from USDA FoodData Central entries for the listed ingredients.
Recipe: Dry-and-Seal Chickpea Crunch
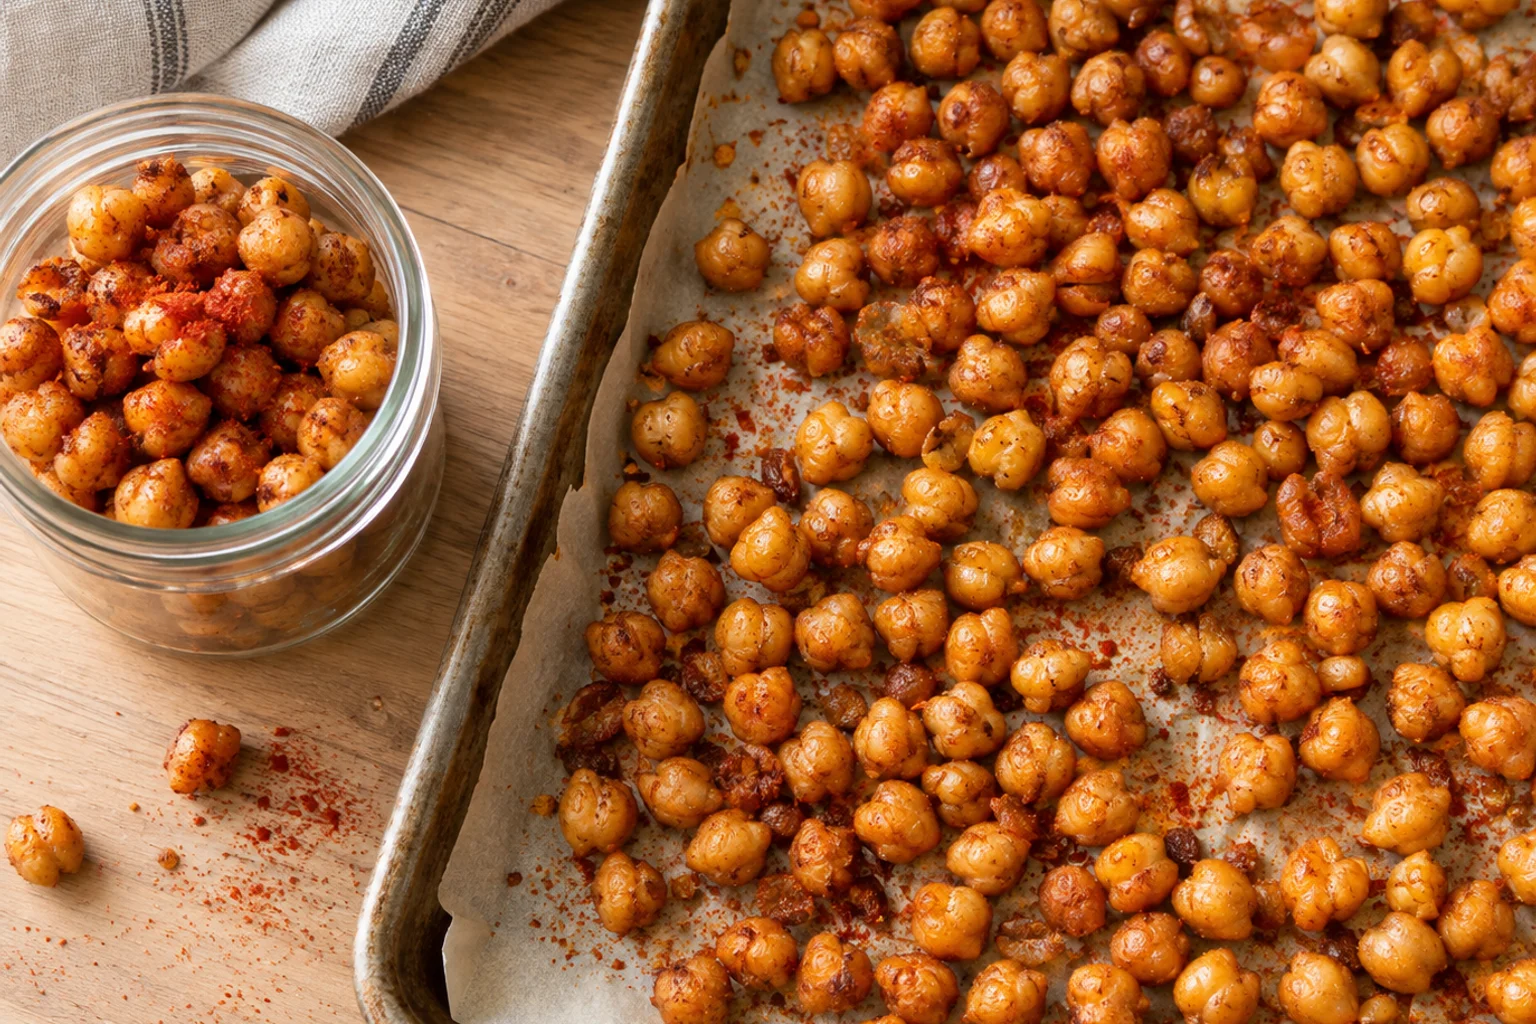
This recipe puts the chickpea method above into one place, with a long, gentle finish to dry the centers. It makes a high-fiber snack that holds up in a jar with a desiccant packet.
Recipe · Easy · gluten-free, dairy-free, vegan
Dry-and-Seal Chickpea Crunch
Roasted chickpeas finished in a cooling oven so the centers dry out and stay crisp in storage, with about 5 g protein per serving.
- Prep
- 15 min
- Cook
- 35 min
- Chill/set
- 30 min
- Total
- 1 hr 20 min
- Makes
- 8 servings (about 1/4 cup / 40 g each)
- Protein
- 5g
- Calories
- 100
- Carbs
- 13g
- Fat
- 3.5g
- Fiber
- 4g
- Sodium
- 200mg
Per serving, approximate.
Ingredients
- 2 cans (15 oz / 425 g each) chickpeas, drained and rinsed (shop at Amazon, opens in a new tab)
- 1 tbsp (15 ml) extra-virgin olive oil (shop at Amazon, opens in a new tab)
- 1 tsp smoked paprika (shop at Amazon, opens in a new tab)
- 1/2 tsp kosher salt (shop at Amazon, opens in a new tab)
Equipment
Steps
- Heat the oven to 400°F (200°C). Drain and rinse the chickpeas, then pat them dry in a clean towel and let them air-dry 15 minutes, rubbing off any loose skins.
- Toss the chickpeas with the olive oil, smoked paprika and salt until evenly coated.
- Spread in a single layer on a parchment-lined sheet pan and roast 30–35 minutes, shaking the pan every 10 minutes, until deep golden and crunchy at the edges.
- Turn the oven off, crack the door open about an inch, and leave the pan inside for 30 minutes to finish drying the centers.
- Cool completely at room temperature, then bite one in half: the center should be dry and crisp, not mealy. If it is soft, return the pan to a 250°F (120°C) oven for 10 more minutes.
- Pack in a dry jar with a food-safe desiccant packet and label with the date.
Storage: Room temperature 3–7 days in an airtight container with desiccant; fridge 2 weeks; freezer 2–3 months.
If the chickpeas are not crisp after cooling, do not seal them. Soft chickpeas in a closed container will mold, so refrigerate and eat them within a few days.
How can you tell if homemade jerky has gone bad?
Homemade jerky has gone bad if it shows mold, smells sour or rancid, or feels slimy or sticky. Mold, which looks like fuzzy or powdery white, green, blue or black spots, is the clearest signal. Check every snack and the package before eating, because preservation lowers risk but never removes it. The same signs apply to other dried protein snacks.
- Fuzzy or powdery spots mean mold, and its roots can extend past what you see. Discard the whole batch or container, and do not scrape or cut off the spot.
- A sour, rotten, ammonia or "off" smell means bacterial spoilage. Discard.
- A rancid smell like paint, crayons, old oil or cardboard means the fat oxidized. It is not usually dangerous, but discard it.
- A slimy or sticky surface on meat or egg snacks means bacterial growth. Discard.
- Jerky that was dry and is now soft, damp or tacky took on moisture. Discard it if it was stored warm. If it was in the fridge and smells fine, dry it again briefly and eat it soon.
- A swollen, bulging or hissing bag or jar means gas from bacterial or yeast growth. Discard it without opening or tasting, and do not sniff.
- Condensation inside a sealed container means trapped moisture. Dry the food more, and discard it if mold is present.
- Grayish, dry patches are freezer burn. The food is safe but lower quality, so trim it and use it in cooking.
Botulism toxin gives no visible or smell warning, which is why the refrigeration rules and heat steps matter more than your nose. When in doubt, throw it out.
For more shelf-stable and fridge-friendly ideas, browse our savory meat, fish and egg snacks. If you are choosing gear, the pantry shopping guide covers storage containers, protein powders and tools in one place.
Shop this article
20 ingredients and tools. Add them to your list, then send it to Amazon, Whole Foods or Instacart.
Beans, soy & plant protein
Nuts, seeds & nut butters
- Raw almondsAmazon (opens in a new tab)Whole Foods (opens in a new tab)Instacart (opens in a new tab)
- Dry-roasted peanuts, unsaltedAmazon (opens in a new tab)Whole Foods (opens in a new tab)Instacart (opens in a new tab)
- Pumpkin seeds (pepitas)Amazon (opens in a new tab)Whole Foods (opens in a new tab)Instacart (opens in a new tab)
Sweeteners & chocolate
Sauces, spices & flavor
- Curing salt #1 (Prague powder #1, 6.25% sodium nitrite)Amazon (opens in a new tab)Instacart (opens in a new tab)
- Extra-virgin olive oilAmazon (opens in a new tab)Whole Foods (opens in a new tab)Instacart (opens in a new tab)
- Smoked paprikaAmazon (opens in a new tab)Whole Foods (opens in a new tab)Instacart (opens in a new tab)
- Kosher saltAmazon (opens in a new tab)Whole Foods (opens in a new tab)Instacart (opens in a new tab)
Kitchen tools
- Instant-read meat thermometerAmazon (opens in a new tab)Instacart (opens in a new tab)
- Food dehydrator with temperature control (to 160°F+)Amazon (opens in a new tab)Instacart (opens in a new tab)
- Rimmed half-sheet pansAmazon (opens in a new tab)Instacart (opens in a new tab)
- Parchment paperAmazon (opens in a new tab)Whole Foods (opens in a new tab)Instacart (opens in a new tab)
Storage & preserving supplies
- Wide-mouth mason jarsAmazon (opens in a new tab)Instacart (opens in a new tab)
- Vacuum sealerAmazon (opens in a new tab)Instacart (opens in a new tab)
- Vacuum sealer bags/rollsAmazon (opens in a new tab)Instacart (opens in a new tab)
- Oxygen absorbers (100–300 cc)Amazon (opens in a new tab)Instacart (opens in a new tab)
- Resealable Mylar bagsAmazon (opens in a new tab)Instacart (opens in a new tab)
- Food-safe silica gel desiccant packetsAmazon (opens in a new tab)Instacart (opens in a new tab)
- Freezer labels and markerAmazon (opens in a new tab)Instacart (opens in a new tab)
Frequently asked questions
Can you store homemade jerky in a zip-top bag?
Yes, for short-term storage. A zip-top freezer bag keeps fully dried jerky for roughly 1–2 weeks in a cool cupboard, but it lets in air and humidity over time. Squeeze out the air, add a food-safe desiccant packet, and move the bag to the fridge or freezer if you will not finish it within two weeks.
Why does my homemade jerky get moldy?
Jerky molds when it was sealed with too much moisture, usually from strips that were under-dried or packed while still warm. Trapped steam condenses inside the bag and gives mold the water it needs. Cool strips fully, run the bend test, rest them 24 hours in a loosely closed jar, and discard any batch that shows fuzz.
Can you freeze homemade jerky, and how do you thaw it?
Yes. Freeze cooled, dry jerky in vacuum-sealed or tightly closed freezer bags at 0°F (−18°C), where it stays safe indefinitely and keeps its best quality for about 6 months. Thaw the sealed bag in the fridge overnight so condensation forms on the outside of the bag, not on the jerky.
How long do dehydrated protein snacks last besides jerky?
It depends on fat and moisture. Crisp roasted chickpeas keep 3–7 days at room temperature in an airtight jar, spiced nuts 2–4 weeks, and cheese crisps 2–3 days. All of them last months longer in the freezer. Anything soft, such as egg bites or yogurt bark, stays out of the pantry entirely.
Should I label homemade snacks with a date?
Yes. Write the snack name and the date made on every container, then eat the oldest first. A date removes guesswork about age, which is the main reason people throw out good food or keep bad food. Use freezer labels or masking tape and a marker that survives cold and moisture.
Do I need an oxygen absorber and a desiccant in the same jar?
Usually not. Oxygen absorbers protect fats from going rancid and slow mold on dry foods, while desiccant packets pull moisture out of crisp snacks like roasted chickpeas. Pick the one that matches the problem, and do not seal an absorber in a bag with soft, moist food.
Sources
- National Center for Home Food Preservation: Drying Foods (opens in a new tab)
- National Center for Home Food Preservation: Home page (opens in a new tab)
- USDA FSIS: Jerky and Food Safety (opens in a new tab)
- FoodSafety.gov: Cold Food Storage Charts (opens in a new tab)
- Penn State Extension (opens in a new tab)
- University of Georgia Extension (opens in a new tab)
- FDA: Food Safety (opens in a new tab)
More reading on protein, sugar and snack labels is collected on our resources page.