Recipes
No Bake Protein Balls and Homemade Protein Bars: Ratios, Recipes and Fixes
By Editorial Team. Updated . 17 min read. 8 recipes, each under 2 hours.
Store links may be affiliate links. We may earn a commission; it never changes what we recommend.
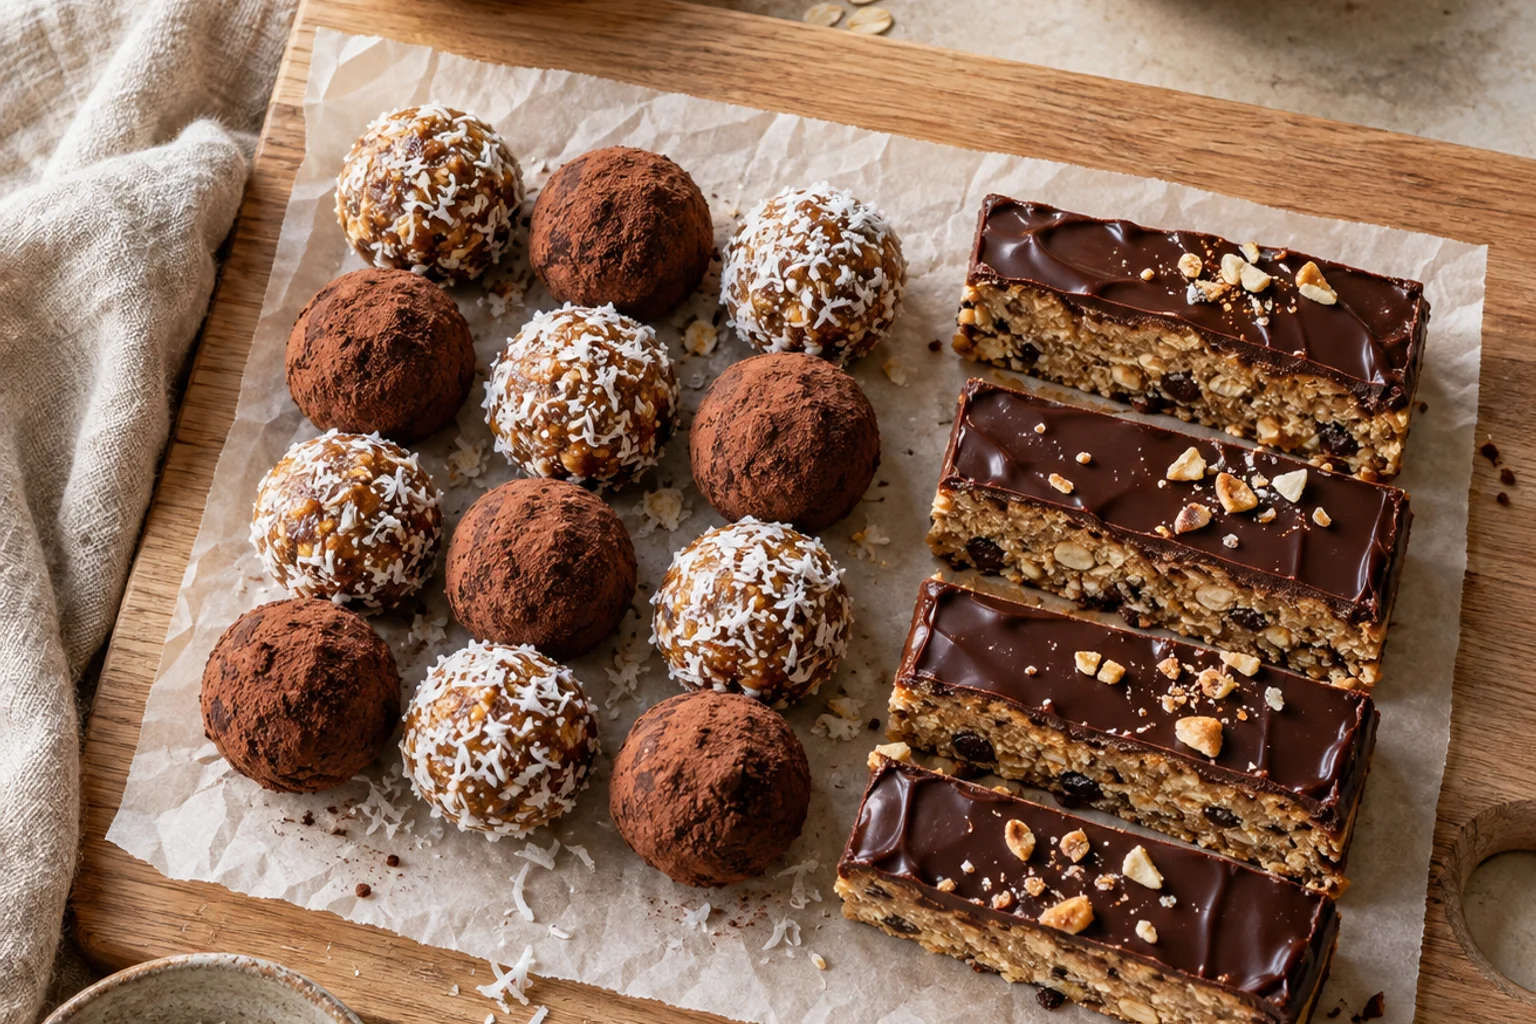
No bake protein balls take 45 minutes or less with one weight-based ratio: 100 g dry base to 60–90 g nut butter, 40–60 g sticky sweetener and 20–40 g mix-ins. Whey makes softer dough than casein or plant powder. The recipes here give 8–14 g protein per serving, and homemade protein bars use the same method.
Key takeaways
- Weigh the ingredients. Cups of powder, oats and nut butter vary by 20–30 percent, and the ratio is what makes the dough hold.
- Dough too crumbly? Add nut butter or milk by the teaspoon. Too wet? Add oat flour or powder by the tablespoon, then chill 15 minutes.
- Whey stays softer and can turn rubbery. Casein and plant protein absorb more liquid and set firmer, so rest the dough 5 minutes before judging it.
- Cookie-dough bites use oat or almond flour. Heat-treat any grain flour to 165°F (74°C) first and skip raw eggs.
- Balls keep 1–2 weeks in the fridge or up to 3 months in the freezer. Freeze bars individually wrapped.
- Homemade bars cost about $0.75–$1.60 each, versus roughly $1.50–$4.00 for store-bought.
What is the ratio for no bake protein balls?
The ratio for no bake protein balls is 100 g dry base (oats plus protein powder) to 60–90 g nut or seed butter, 40–60 g sticky sweetener and 20–40 g mix-ins, with milk added by the teaspoon. Start at 100 : 75 : 50 : 25 by weight. It works with whey, casein or plant powder after small liquid adjustments.
| Component | What it does | Grams per 100 g of dry base |
|---|---|---|
| Dry base (oats, oat flour, protein powder) | Structure and protein | 100 |
| Binder (nut or seed butter) | Fat, flavor, holds everything | 60–90 |
| Sticky sweetener (honey, maple, date paste) | Glue and sweetness | 40–60 |
| Mix-ins (chips, seeds, freeze-dried fruit) | Texture and flavor | 20–40 |
| Adjusting liquid (milk, water) | Fine-tunes the dough | 0–30, by the teaspoon |
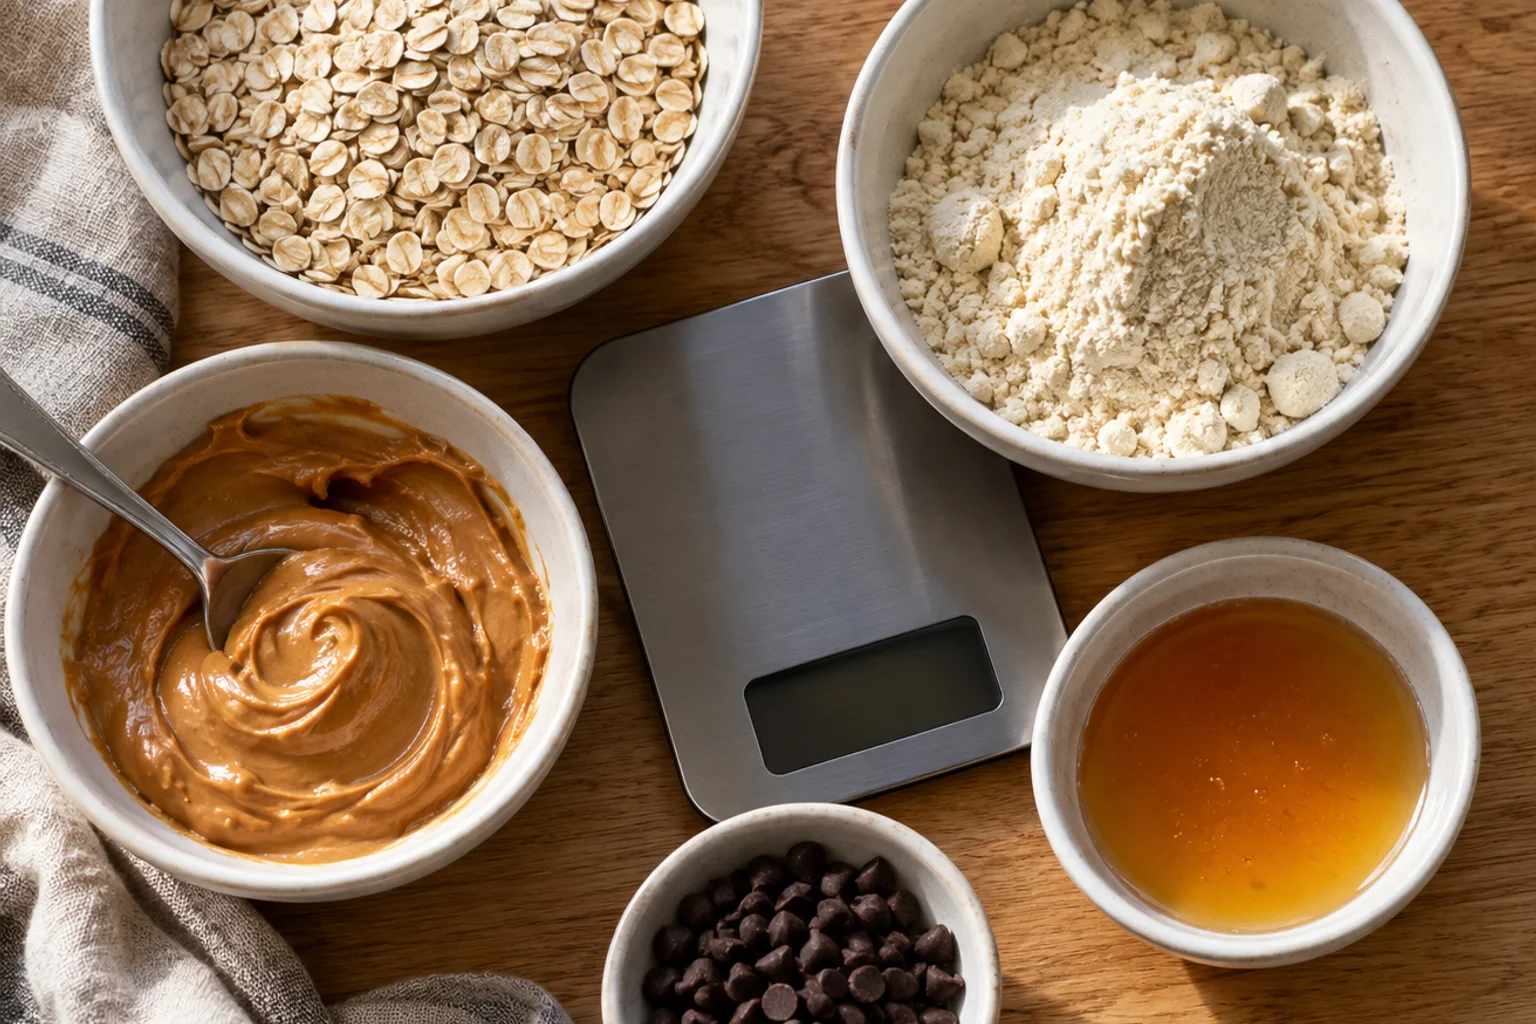
Protein balls, also called protein energy bites, are four things: a dry base, a fat binder, a sticky sweetener and a few mix-ins. Once you know the proportions by weight, you can improvise with whatever is in the pantry. Use a digital kitchen scale (shop at Amazon, opens in a new tab) set to grams.
For a standard batch, the 100 : 75 : 50 : 25 starting point is about 90 g rolled oats plus 60 g protein powder (150 g dry), 110 g nut butter, 75 g honey and 40 g chocolate chips. Mix, squeeze a handful, and adjust.
Within the dry base, a protein-forward split is about 60 percent oats and 40 percent powder by weight. Past 50 percent powder the ball turns chalky and dense and needs more liquid. Under 25 percent you get a pleasant oat ball with only 4–5 g protein.
How much protein is in one protein ball?
One protein ball has about 4.5 g protein with 1 scoop of whey per 16-ball batch, about 6 g with 2 scoops and about 7.5 g with 3 scoops. The base batch of 90 g oats and 130 g peanut butter supplies roughly 3 g per ball before any powder, and each 30 g scoop is assumed to carry about 25 g protein.
| Whey scoops per batch | Powder (g) | Protein per ball (g) | Protein per 2-ball serving (g) |
|---|---|---|---|
| 1 | 30 | about 4.5 | about 9 |
| 2 | 60 | about 6 | about 12 |
| 3 | 90 | about 7.5 | about 15 |
More powder thickens the dough, so add milk by the teaspoon, roughly 1–2 teaspoons per extra 10 g of powder.
What is the ratio for homemade protein bars?
The ratio for homemade protein bars is about 100 g dry base to 90–120 g nut butter and 60–75 g sticky sweetener, with 0–40 g mix-ins. Bars need more glue and more compression than balls because they have to hold their shape when cut. Press the mix hard into a lined 8x8-inch pan (20 x 20 cm). Pressure and cold, not baking, turn the dough into a bar.
Crispy bars follow a different rule: roughly 100 g crisps to 120 g binder and sweetener combined, warmed so it coats thinly. They stay light because air is part of the structure.
Protein balls vs protein bars: which should you make?
Protein balls are faster to make and easier to portion at 4–6 g protein each, while homemade protein bars give 10–15 g protein per piece and pack more neatly in a gym bag. Both skip the oven and share the same base ratio.
| Feature | Protein balls | Homemade protein bars |
|---|---|---|
| Hands-on time | 15 min | 10–20 min |
| Total time with chilling | 43–45 min | 57–83 min |
| Protein per piece | 4–6 g per ball | 10–15 g per bar |
| Fridge life | 1–2 weeks | 1–2 weeks (crispy bars 1 week) |
| Freezer life | Up to 3 months | Up to 3 months |
Which protein powder works best in no bake protein balls?
Whey protein isolate is the easiest powder for no bake protein balls because it mixes smoothly and keeps the dough soft, while casein and plant powders set firmer and absorb more liquid. The same 60 g scoop can make a soft ball or a brick, depending on the protein, so adjust the binder when you switch.
| Powder | Behavior in no-bake dough | Adjustment |
|---|---|---|
| Whey protein isolate (shop at Amazon, opens in a new tab) | Mixes smoothly, stays softer, can turn sticky or rubbery if overmixed or if the dough is wet | Use a little less liquid; mix until just combined; chill before shaping |
| Micellar casein (shop at Amazon, opens in a new tab) | Thickens like pudding, sets firm, absorbs the most liquid | Add 25–50 percent more binder or milk; rest 10 minutes |
| Pea protein (shop at Amazon, opens in a new tab) or plant blend (shop at Amazon, opens in a new tab) | Absorbs a lot, slightly earthy and gritty | Add extra binder, use a stronger flavor like cocoa or cinnamon |
| Powdered peanut butter (shop at Amazon, opens in a new tab) | Absorbs moderately, adds only about 4–5 g protein per 2 tablespoons | Use as part of the dry base, not the only protein |
Those adjustments are rules of thumb. Brands differ in particle size, added gums and flavoring, so treat the first batch as a test. If you buy a new tub, make a half batch and write down the milk you needed. The pantry shopping guide covers how to choose a powder that mixes well and has a clean label.
For plant powder, start with 25–50 percent more binder than the whey version, then add water or plant milk 1 tablespoon at a time until the dough clumps. The date bars below needed 2–4 tablespoons.
How do you fix crumbly, sticky or rubbery protein balls?
Crumbly protein balls need 1 teaspoon of nut butter or milk at a time, while sticky balls need 1 tablespoon of oat flour at a time plus 15 minutes in the fridge. Rest the dough 5 minutes before judging it, because the oats and powder keep absorbing moisture. Most problems take under two minutes to fix.
Too dry or crumbly
If the mix will not hold when you squeeze a tablespoon in your fist, add 1 teaspoon of nut butter or milk, knead for 20 seconds, and test again. Nut butter makes it richer and denser; milk keeps it lighter. Stop adding when the ball holds but still feels slightly dry on the surface, because chilling softens the oats and powder further.
Too wet or sticky
If the dough clings to your hands and slumps off the scoop, add 1 tablespoon of oat flour (shop at Amazon, opens in a new tab) or powder at a time. Oat flour is gentler than more protein powder, which can tighten up and turn the mix chalky. Chill the bowl for 15 minutes before judging again.
Greasy
Natural peanut butter separates, and the oil on top can make the dough slick. Stir the jar thoroughly before measuring, or pour off a spoonful of oil. Add a tablespoon of oats or powder to soak up the extra fat.
Rubbery or gummy (usually whey)
Whey proteins tighten with heat and with overworking. Mix by hand or with a spatula until just combined, keep the dough cool, and avoid hot syrup. If it is already rubbery, a splash of milk and a 10-minute rest usually loosens it.
Bland
Salt fixes bland protein balls more often than sugar does. A quarter teaspoon of kosher salt per batch brings out the nut butter and chocolate.
Recipes: no bake protein balls
The three ball recipes below use the same method: stir, rest, scoop, chill. A cookie scoop (shop at Amazon, opens in a new tab) (1 tablespoon) gives even balls, which also makes the nutrition numbers reliable.
Peanut butter chocolate chip protein balls
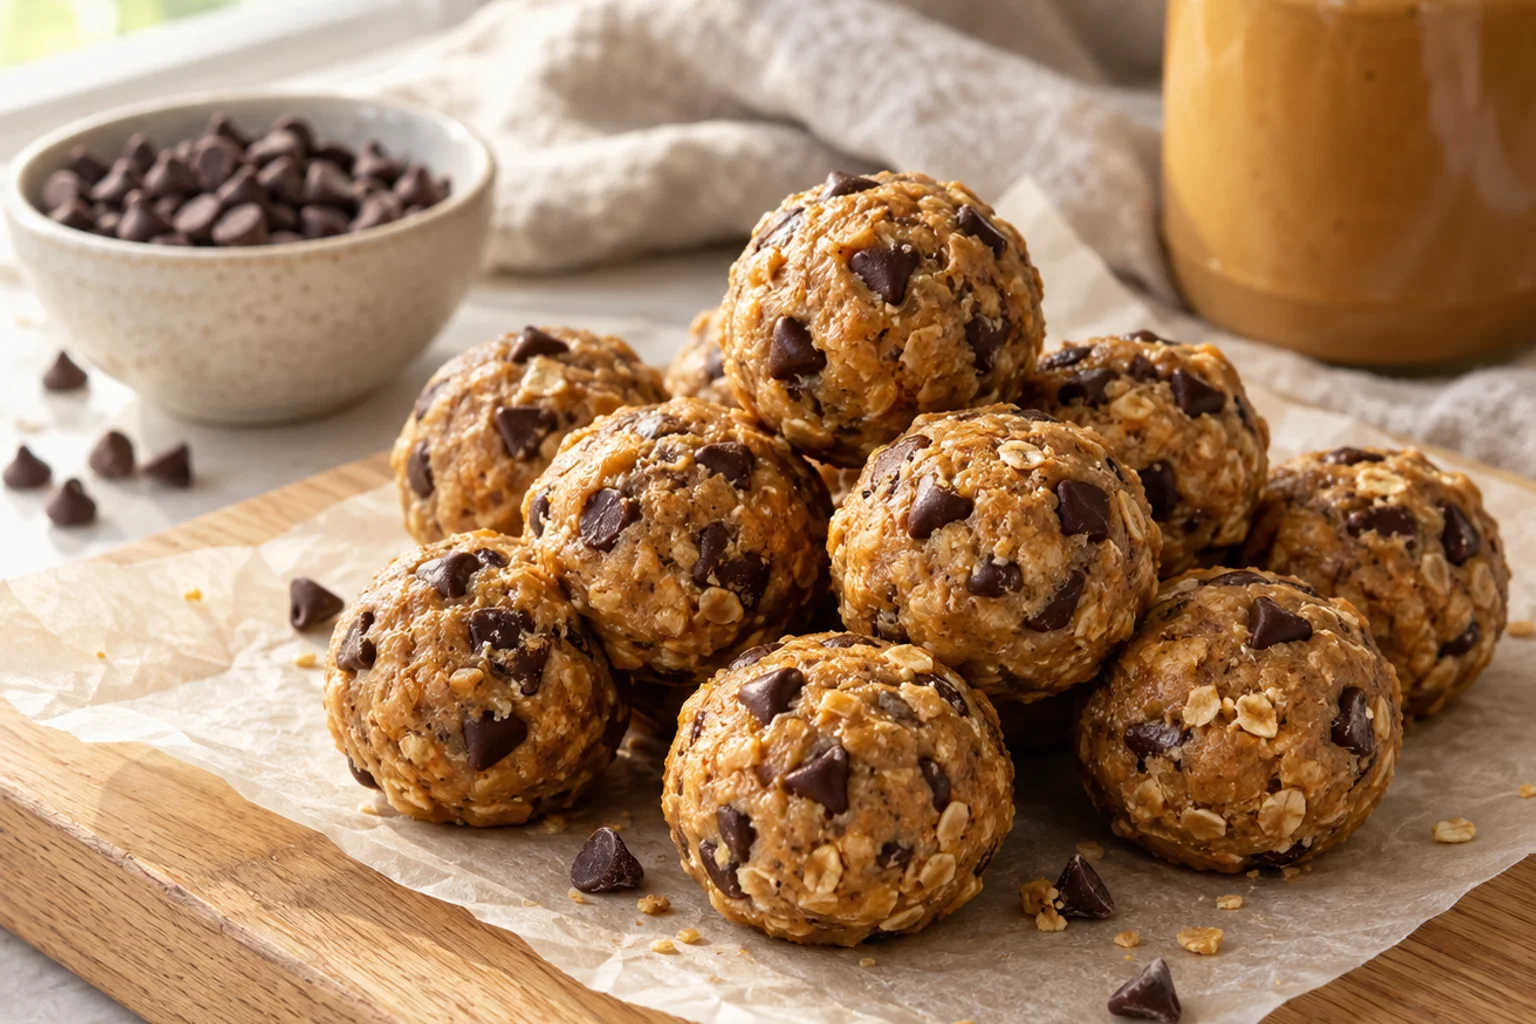
Peanut butter, oats and vanilla whey give a flavor close to a peanut butter cookie, and mini chocolate chips keep every bite interesting. Two balls provide about 12 g protein.
Recipe · Easy · vegetarian
Peanut Butter Chocolate Chip Protein Balls
Soft, cookie-flavored peanut butter protein balls with 12 g protein per serving that hold their shape straight from the fridge.
- Prep
- 15 min
- Cook
- 0 min
- Chill/set
- 30 min
- Total
- 45 min
- Makes
- 8 servings (2 balls each, 16 balls total)
- Protein
- 12g
- Calories
- 230
- Carbs
- 23g
- Fat
- 10.5g
- Fiber
- 2g
- Sodium
- 75mg
Per serving, approximate.
Ingredients
- 1 cup (90 g) old-fashioned rolled oats (shop at Amazon, opens in a new tab)
- 1/2 cup (60 g) vanilla whey protein isolate (about 2 scoops) (shop at Amazon, opens in a new tab)
- 1/2 cup (130 g) natural peanut butter, well stirred (shop at Amazon, opens in a new tab)
- 1/4 cup (85 g) honey (shop at Amazon, opens in a new tab)
- 1/4 cup (45 g) mini dark chocolate chips (shop at Amazon, opens in a new tab)
- 2 tbsp (30 ml) milk, plus more by the teaspoon (shop at Whole Foods, opens in a new tab)
- 1 tsp pure vanilla extract (shop at Amazon, opens in a new tab)
- 1/4 tsp kosher salt (shop at Amazon, opens in a new tab)
Equipment
Steps
- Line a sheet pan with parchment paper. Stir the oats, whey and salt together in a large bowl for 30 seconds.
- Add the peanut butter, honey, milk and vanilla. Stir with a firm spatula for about 2 minutes until the dough comes together, then fold in the chocolate chips.
- Squeeze a tablespoon of dough in your fist. If it crumbles, add 1 teaspoon milk or peanut butter and mix again; if it sticks to your palm, add 1 tablespoon oats. Rest the bowl for 5 minutes.
- Scoop level tablespoons of dough, roll each between damp palms into a ball, and set it on the lined pan. You should have 16 balls.
- Chill the pan in the fridge for 30 minutes, or in the freezer for 15 minutes, until the balls are firm.
- Transfer to an airtight container. Keep in the fridge up to 2 weeks.
Storage: Fridge 1–2 weeks in an airtight container; freezer up to 3 months, layered between parchment.
For a softer, more brownie-like ball, swap the whey for chocolate whey and roll the finished balls in cocoa. If your peanut butter is very runny, use 2 tablespoons less milk.
Edible cookie-dough protein bites
Raw flour is the one real safety issue in no-bake "cookie dough." The FDA notes that flour is a raw agricultural product and can carry harmful bacteria such as E. coli, which is why it advises against eating raw dough. Heat treating fixes this: spread the flour on a sheet pan and bake at 350°F (175°C) for 5 to 10 minutes, stirring once, until an instant-read thermometer (shop at Amazon, opens in a new tab) reads 165°F (74°C) in several spots. Cool it completely before mixing, or the whey will clump. A microwave works too: heat in 30-second bursts, stirring each time, and check the temperature before using.
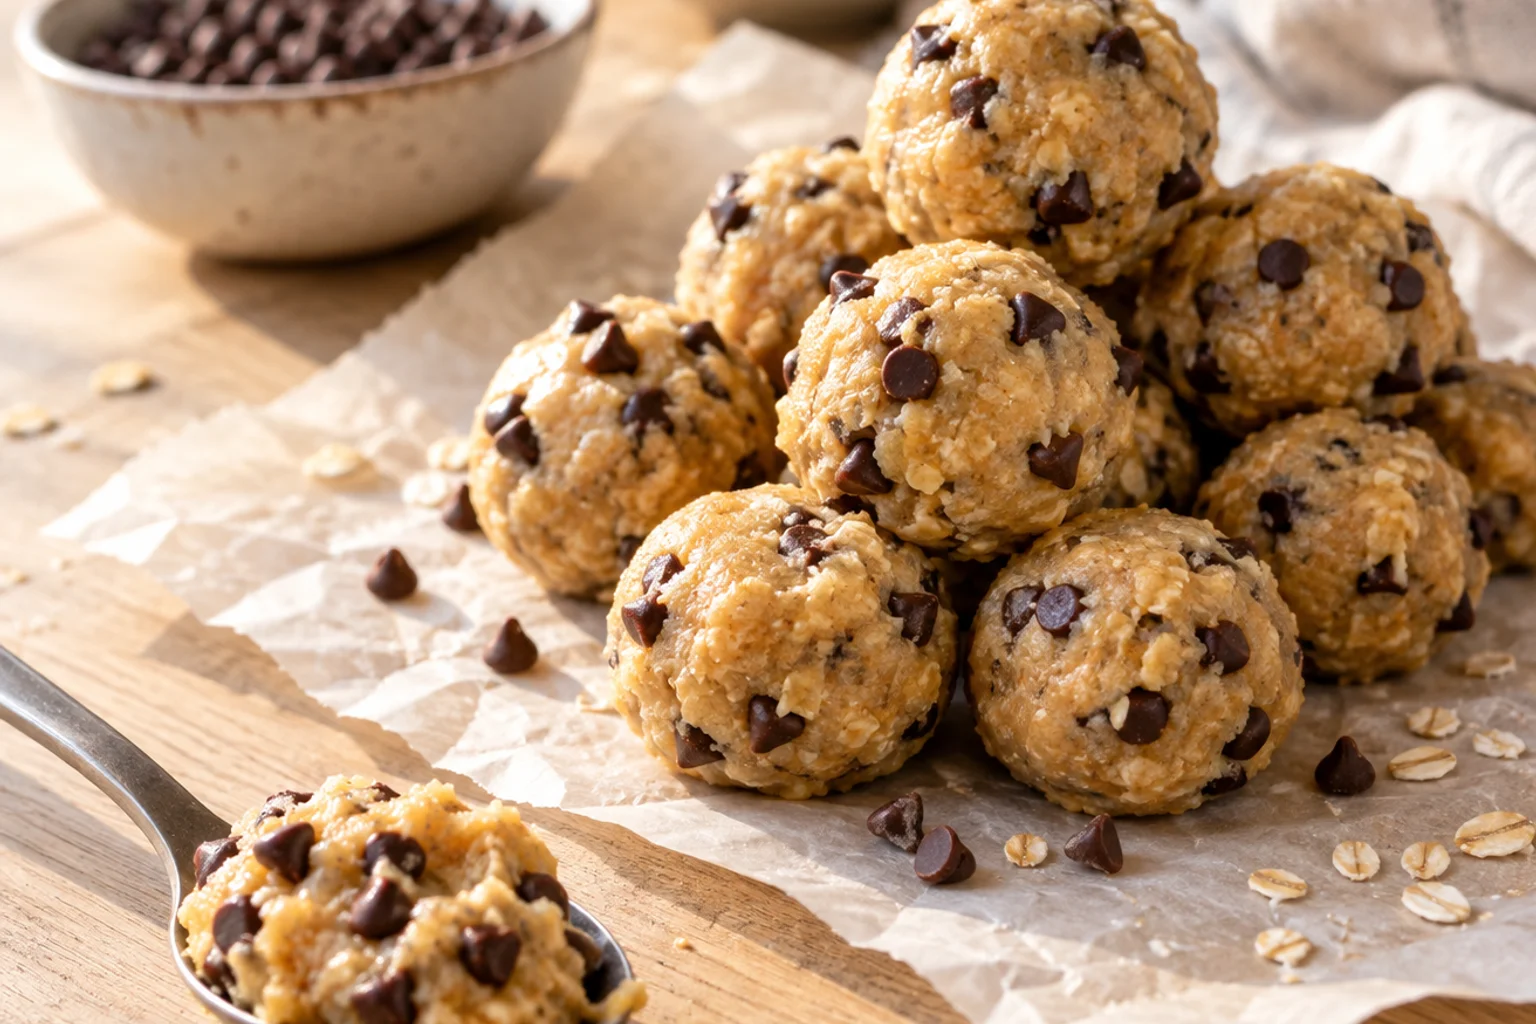
No eggs go into these. Almond butter, maple syrup and a little milk give the buttery, brown-sugar flavor.
Recipe · Easy · vegetarian
Edible Cookie-Dough Protein Bites
Brown-sugar-flavored cookie-dough protein bites with 13 g protein per serving, made with heat-treated oat flour and no raw eggs.
- Prep
- 15 min
- Cook
- 8 min
- Chill/set
- 20 min
- Total
- 43 min
- Makes
- 6 servings (3 bites each, 18 bites total)
- Protein
- 13g
- Calories
- 255
- Carbs
- 25g
- Fat
- 13g
- Fiber
- 3g
- Sodium
- 55mg
Per serving, approximate.
Ingredients
- 1 cup (100 g) oat flour, for heat-treating (shop at Amazon, opens in a new tab)
- 3/4 cup (45 g) vanilla whey protein isolate (about 1.5 scoops) (shop at Amazon, opens in a new tab)
- 1/3 cup (85 g) almond butter, well stirred (shop at Amazon, opens in a new tab)
- 2 tbsp (40 g) pure maple syrup (shop at Amazon, opens in a new tab)
- 1/4 cup (60 ml) milk, plus more by the teaspoon (shop at Whole Foods, opens in a new tab)
- 1 tsp pure vanilla extract (shop at Amazon, opens in a new tab)
- 1/4 tsp kosher salt (shop at Amazon, opens in a new tab)
- 1/3 cup (60 g) mini dark chocolate chips (shop at Amazon, opens in a new tab)
Equipment
Steps
- Heat the oven to 350°F (175°C). Spread the oat flour in an even layer on a sheet pan and bake 8 minutes, stirring once, until an instant-read thermometer reads at least 165°F (74°C) in three spots.
- Let the flour cool completely, about 10 minutes, then sift it into a bowl with the whey and salt.
- Stir in the almond butter, maple syrup, milk and vanilla until a thick, scoopable dough forms, adding milk 1 teaspoon at a time if it is dry. Fold in the chocolate chips.
- Scoop level tablespoons onto a parchment-lined tray and roll lightly into balls, or flatten into thick rounds for a cookie shape.
- Chill 20 minutes in the fridge before serving. Store in an airtight container.
Storage: Fridge 1 week in an airtight container; freezer up to 3 months.
For a flour-free version, replace the oat flour with 1 cup (96 g) almond flour and skip the heating step. Almond flour is ground raw nuts, not a raw grain flour, and the dough will be softer, so expect to chill it longer. Add 1 tablespoon oat flour at a time if it stays tacky.
Chocolate berry protein bites with freeze-dried fruit
Freeze-dried berries (shop at Amazon, opens in a new tab) add tartness and color without water when crushed to a powder, so they will not make the dough wet. Dried tart cherries add chew; skip them for a smoother bite.
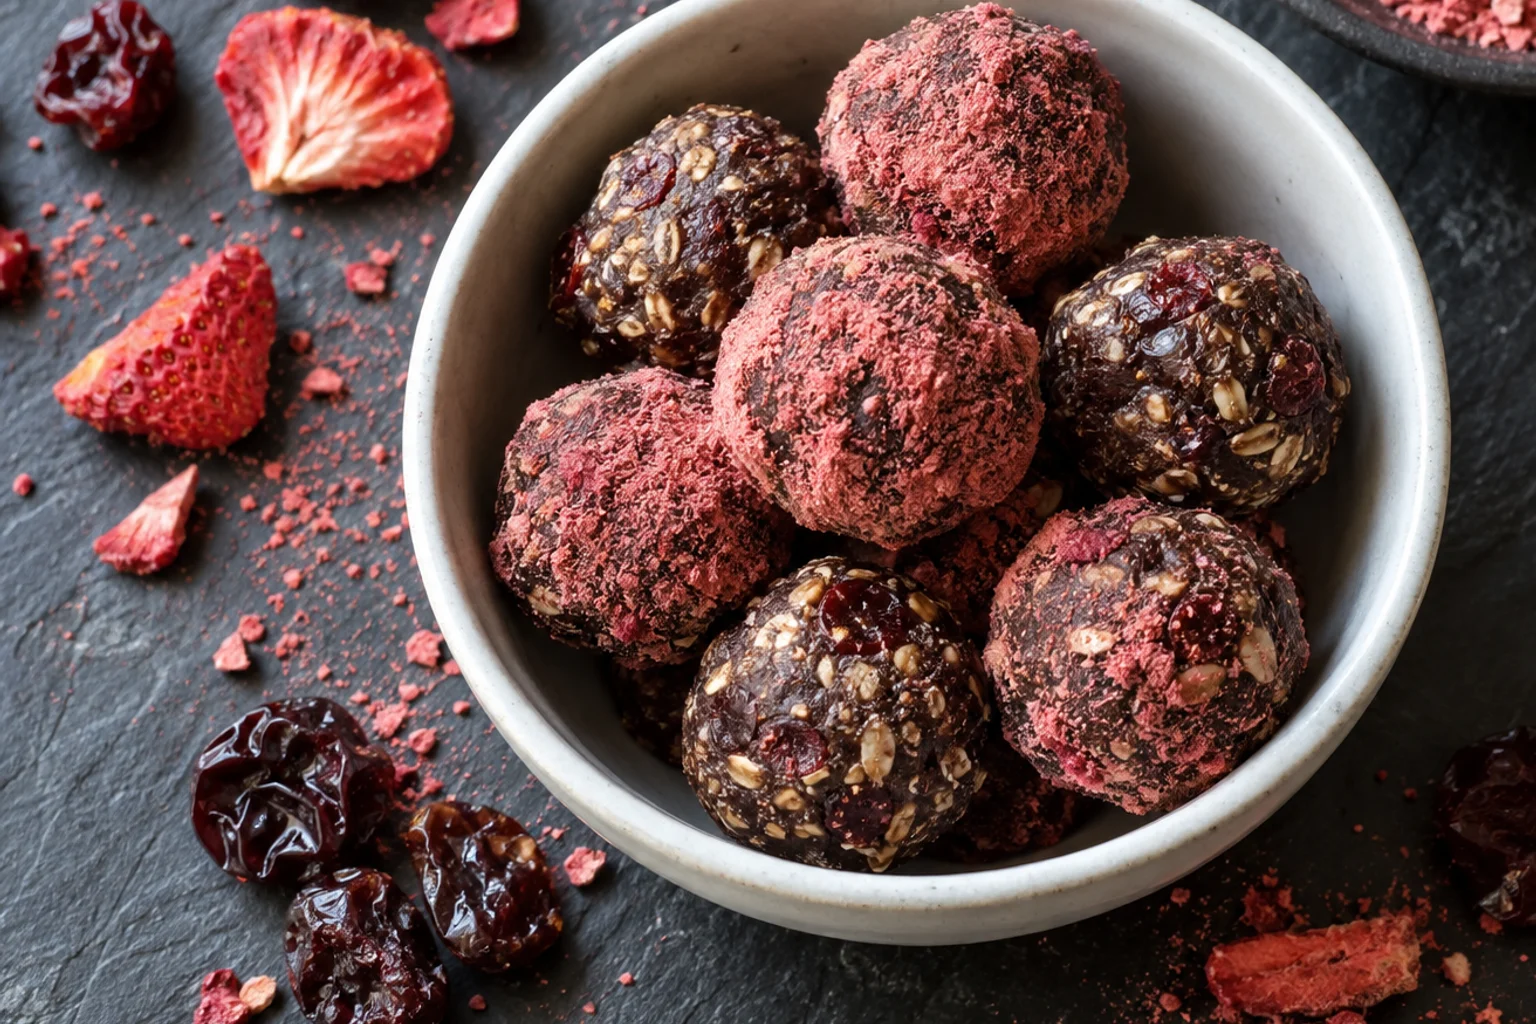
Recipe · Easy · vegetarian
Chocolate Cherry Berry Protein Bites
Fudgy chocolate protein bites with 8 g protein per serving, tart freeze-dried berry powder and optional dried cherries.
- Prep
- 15 min
- Cook
- 0 min
- Chill/set
- 30 min
- Total
- 45 min
- Makes
- 8 servings (2 bites each, 16 bites total)
- Protein
- 8g
- Calories
- 165
- Carbs
- 20g
- Fat
- 7g
- Fiber
- 3g
- Sodium
- 30mg
Per serving, approximate.
Ingredients
- 3/4 cup (70 g) old-fashioned rolled oats (shop at Amazon, opens in a new tab)
- 1/2 cup (45 g) chocolate whey protein powder (shop at Amazon, opens in a new tab)
- 2 tbsp (10 g) unsweetened cocoa powder (shop at Amazon, opens in a new tab)
- 1/3 cup (85 g) almond butter, well stirred (shop at Amazon, opens in a new tab)
- 3 tbsp (63 g) honey (shop at Amazon, opens in a new tab)
- 2 tbsp (30 ml) milk, plus more by the teaspoon (shop at Whole Foods, opens in a new tab)
- 1/2 cup (15 g) freeze-dried strawberries or mixed berries, crushed (shop at Amazon, opens in a new tab)
- 2 tbsp (20 g) dried tart cherries, chopped (optional)
- 1 pinch kosher salt (shop at Amazon, opens in a new tab)
Equipment
Steps
- Pulse the oats in a bowl with the back of a spoon or briefly in a blender until about half are broken into a coarse flour.
- Stir in the chocolate whey, cocoa, crushed freeze-dried berries and salt.
- Add the almond butter, honey and milk and stir for 2 minutes until thick. Add milk 1 teaspoon at a time if it will not hold when squeezed; the freeze-dried fruit absorbs moisture slowly, so rest it 5 minutes before deciding.
- Fold in the dried cherries, then scoop level tablespoons and roll with damp hands into 16 balls.
- Chill on a parchment-lined tray for 30 minutes. Roll in extra berry powder or cocoa if desired.
Storage: Fridge 1–2 weeks in an airtight container; freezer up to 3 months.
Recipes: homemade protein bars without baking
Bars are the same idea as balls with more binder and a lot more pressure. A few rules apply to all four bar recipes below. Line the pan with parchment so the slab lifts out cleanly. Press the mix down with a flat-bottomed measuring cup, working from the center to the corners. The section also includes one nut-free ball recipe.
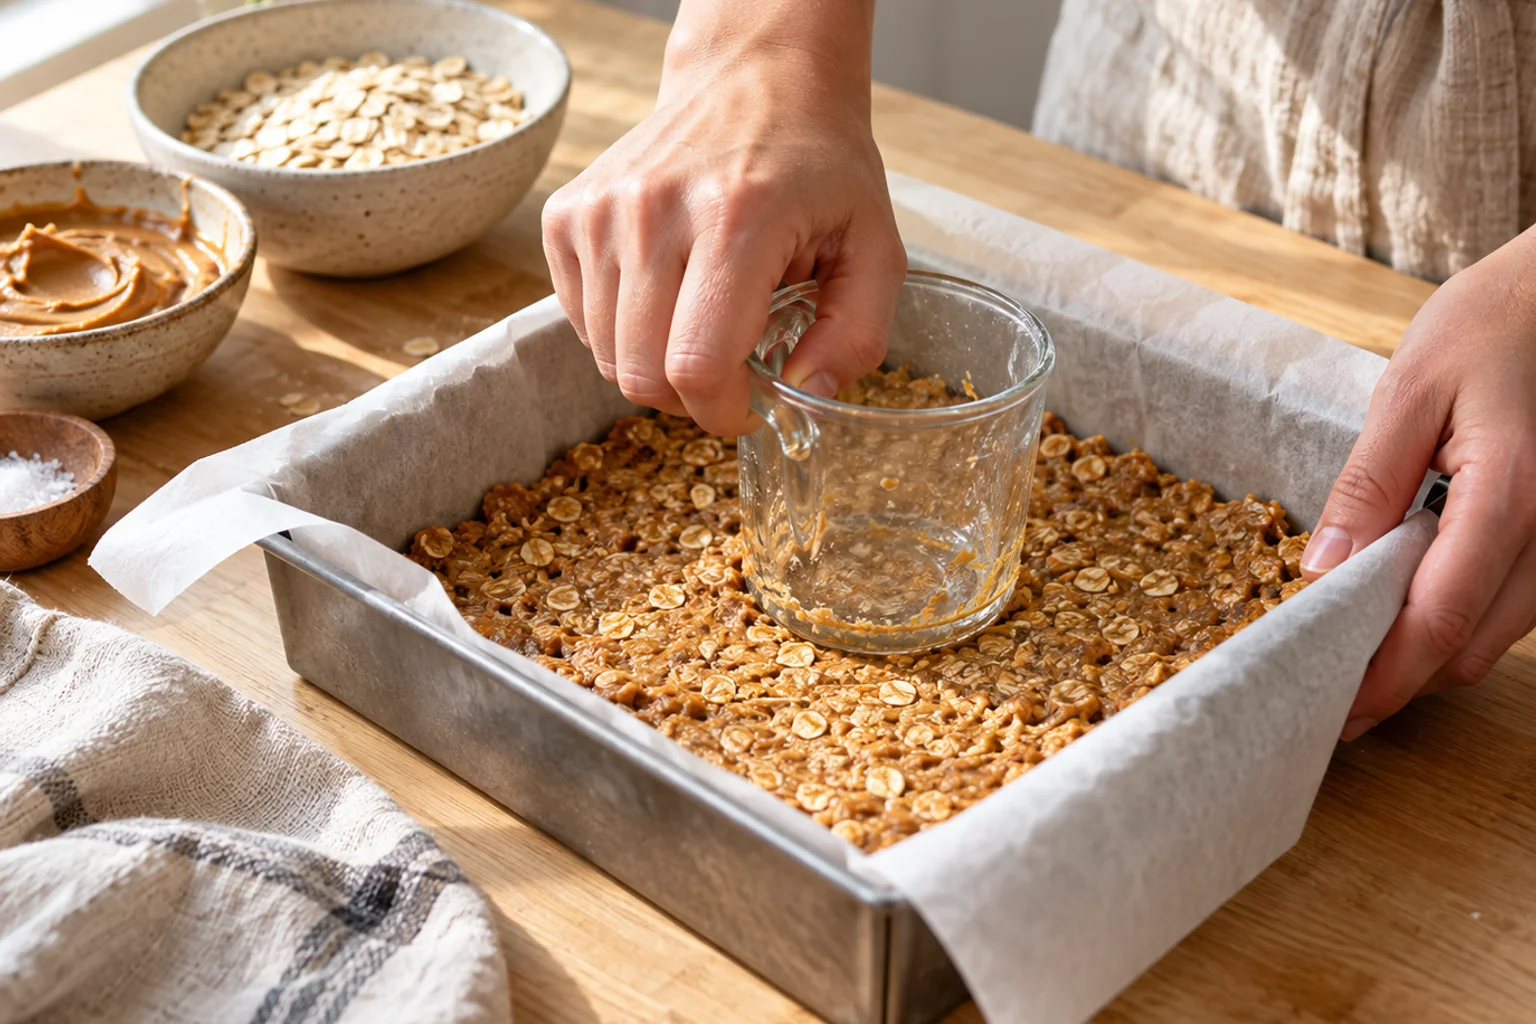
No-bake peanut butter protein bars
This is the base bar. It is dense, chewy and filling, with about 15 grams of protein per bar. Because it uses 100 g of whey, it needs a long chill in the freezer to firm up. The 8x8 pan makes 12 bars.
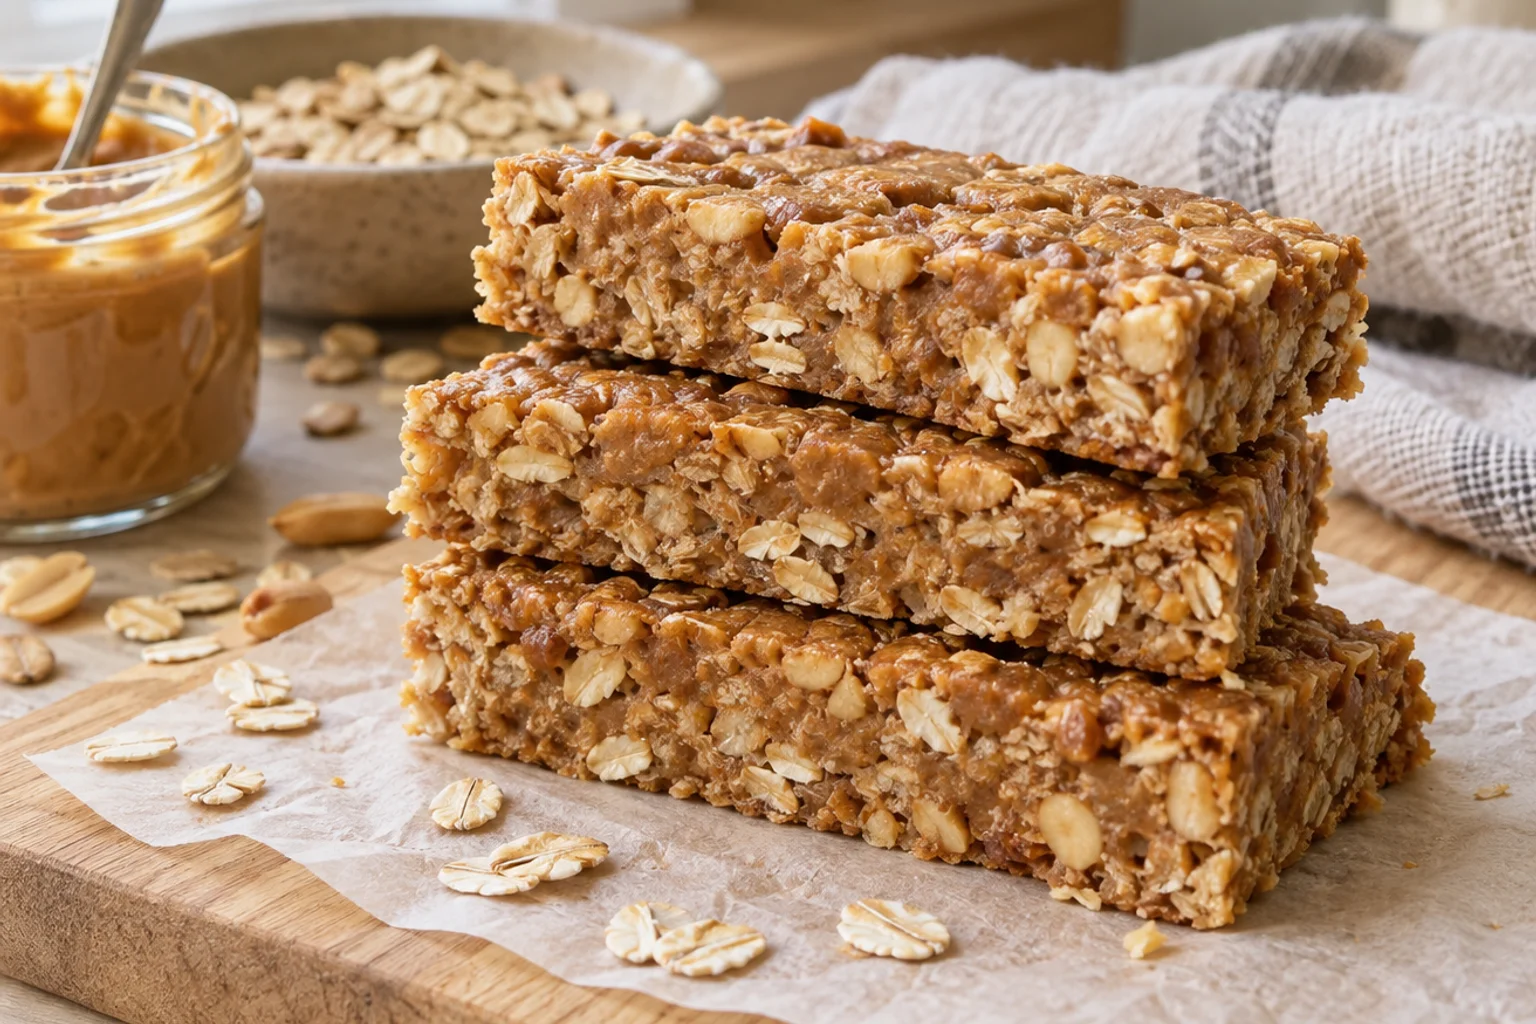
Recipe · Easy · vegetarian
No-Bake Peanut Butter Protein Bars
Thick, chewy peanut butter oat bars with 15 g of protein each, pressed into an 8x8 pan and set in the freezer.
- Prep
- 15 min
- Cook
- 0 min
- Chill/set
- 1 hr
- Total
- 1 hr 15 min
- Makes
- 12 bars
- Protein
- 15g
- Calories
- 250
- Carbs
- 24g
- Fat
- 12g
- Fiber
- 2.5g
- Sodium
- 125mg
Per serving, approximate.
Ingredients
- 1 1/2 cups (135 g) old-fashioned rolled oats (shop at Amazon, opens in a new tab)
- 1 cup (100 g) vanilla whey protein isolate (about 3 scoops) (shop at Amazon, opens in a new tab)
- 1 cup (260 g) natural peanut butter, well stirred (shop at Amazon, opens in a new tab)
- 1/2 cup (170 g) honey (shop at Amazon, opens in a new tab)
- 1/4 cup (60 ml) milk, plus more by the teaspoon (shop at Whole Foods, opens in a new tab)
- 1/4 tsp kosher salt (shop at Amazon, opens in a new tab)
- 1 tsp pure vanilla extract (shop at Amazon, opens in a new tab)
Equipment
Steps
- Line an 8x8-inch pan with parchment so two sides overhang by 2 inches (5 cm).
- Pulse the oats in a food processor for 5 to 6 pulses so about half are chopped; this helps the bars hold together. Stir the oats, whey and salt together in a large bowl.
- Warm the peanut butter and honey in the microwave for 20 seconds, just until pourable, and stir in the vanilla. Pour over the dry mix and add the milk.
- Stir hard with a stiff spatula, then knead with damp hands for 1 minute. The dough should be thick and hold together; add milk 1 teaspoon at a time if it is crumbly.
- Press firmly into the pan in an even layer, smoothing the top with a piece of parchment.
- Freeze for 45 to 60 minutes until firm. Lift out by the parchment, set on a cutting board, and cut into 12 bars with a hot knife.
Storage: Fridge 1–2 weeks, wrapped individually; freezer up to 3 months.
Crispy rice protein bars
These are the lightest bars, with a crunch from protein crisps (shop at Amazon, opens in a new tab) and crisp rice cereal (shop at Amazon, opens in a new tab). The crisps carry most of the protein, so check the label: whey or soy crisps usually run 70 to 80 percent protein by weight, while plain rice cereal has almost none. Warm the binder only until pourable. Very hot honey will tighten the whey and make the bars hard.
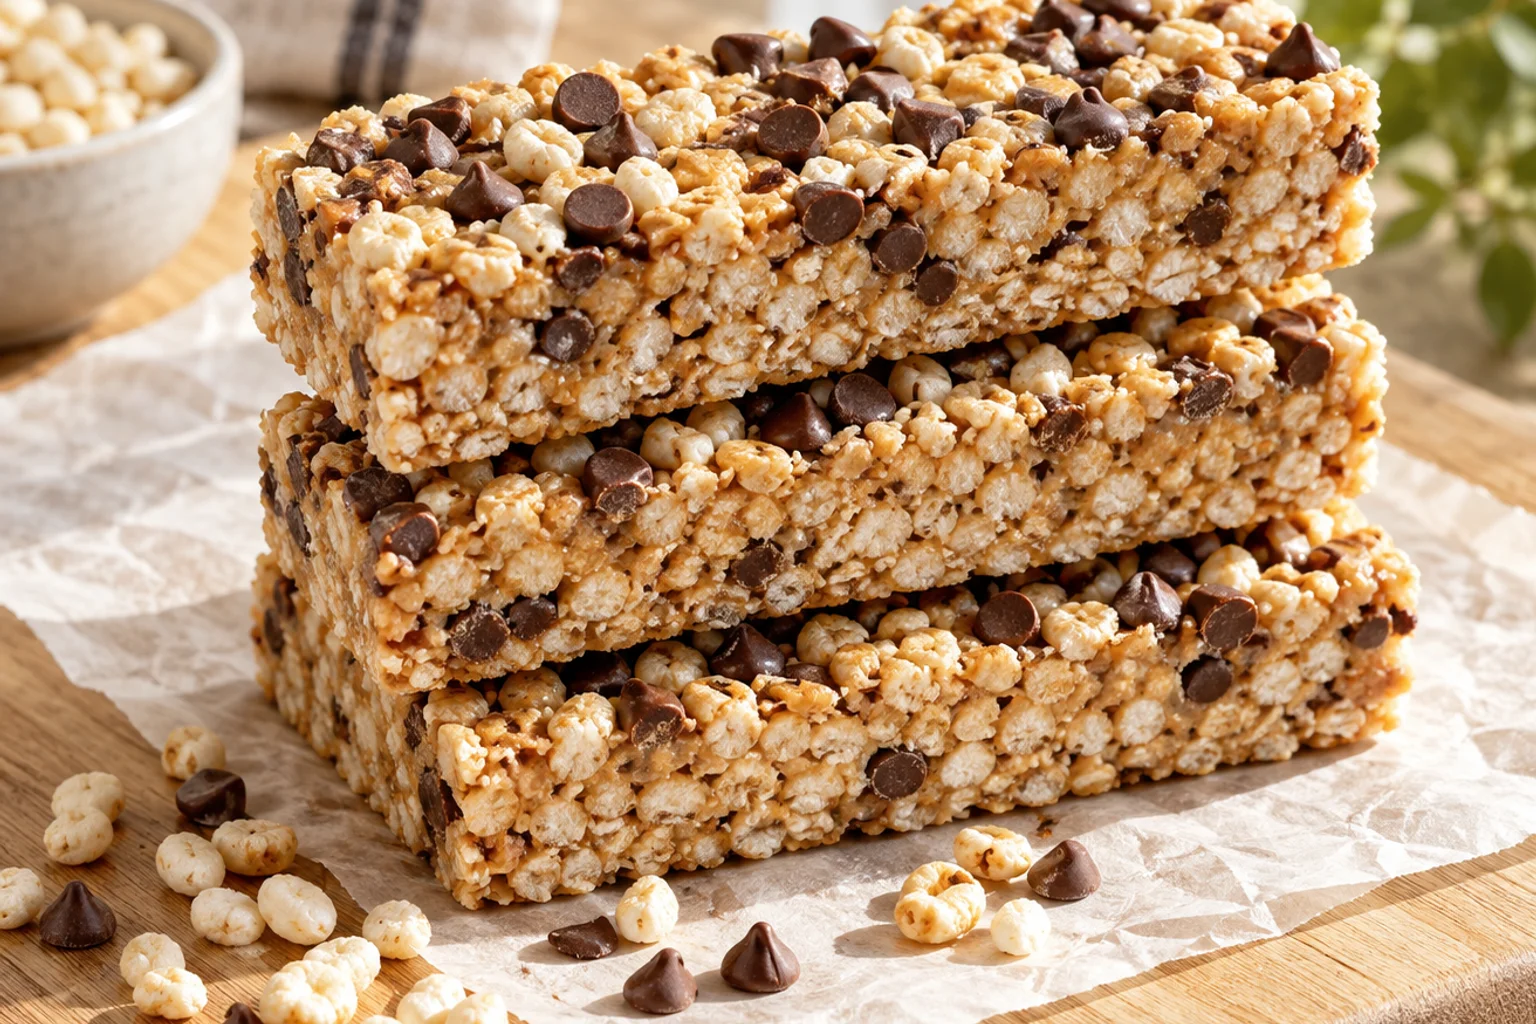
Recipe · Easy · vegetarian
Crispy Rice Protein Bars
Light, crunchy peanut butter protein bars with 14 g protein per bar, made with protein crisps and crisp rice cereal.
- Prep
- 10 min
- Cook
- 2 min
- Chill/set
- 45 min
- Total
- 57 min
- Makes
- 8 bars
- Protein
- 14g
- Calories
- 230
- Carbs
- 24g
- Fat
- 10g
- Fiber
- 1.5g
- Sodium
- 155mg
Per serving, approximate.
Ingredients
- 1 1/2 cups (45 g) crisp rice cereal (shop at Amazon, opens in a new tab)
- 1 1/2 cups (45 g) whey or soy protein crisps (shop at Amazon, opens in a new tab)
- 3 tbsp (45 g) vanilla whey protein isolate (about 1.5 scoops) (shop at Amazon, opens in a new tab)
- 1/2 cup (130 g) natural peanut butter, well stirred (shop at Amazon, opens in a new tab)
- 1/3 cup (113 g) honey (shop at Amazon, opens in a new tab)
- 1/4 cup (45 g) mini dark chocolate chips, for the top (shop at Amazon, opens in a new tab)
- 1 pinch kosher salt (shop at Amazon, opens in a new tab)
Equipment
Steps
- Line an 8x8-inch pan with parchment, leaving two sides overhanging.
- Combine the peanut butter, honey and salt in a microwave-safe bowl and heat for 30 seconds, just until pourable. Whisk in the whey until smooth, working quickly while the mixture is warm.
- Pour the binder over the rice cereal and protein crisps in a large bowl and fold gently with a spatula for 1 minute until every piece is coated.
- Tip into the pan and press down firmly and evenly with a piece of parchment; the crisps crush if you press too hard, so use steady pressure.
- Sprinkle the chocolate chips over the top and press them in lightly.
- Freeze 45 minutes until firm, lift out, and cut into 8 bars with a sharp knife.
Storage: Fridge up to 1 week in an airtight container (crispness fades after that); freezer up to 3 months.
Date-sweetened almond butter bars (plant protein)
Medjool dates sweeten these bars and bind them. Blended with almond butter (shop at Amazon, opens in a new tab) in a food processor (shop at Amazon, opens in a new tab), they form a sticky paste that needs no honey or syrup. Pea or plant protein absorbs plenty of liquid, so water goes in at the end, 2 to 4 tablespoons in total. Each bar has about 10 g protein; the protein-boost section below shows how to raise that.
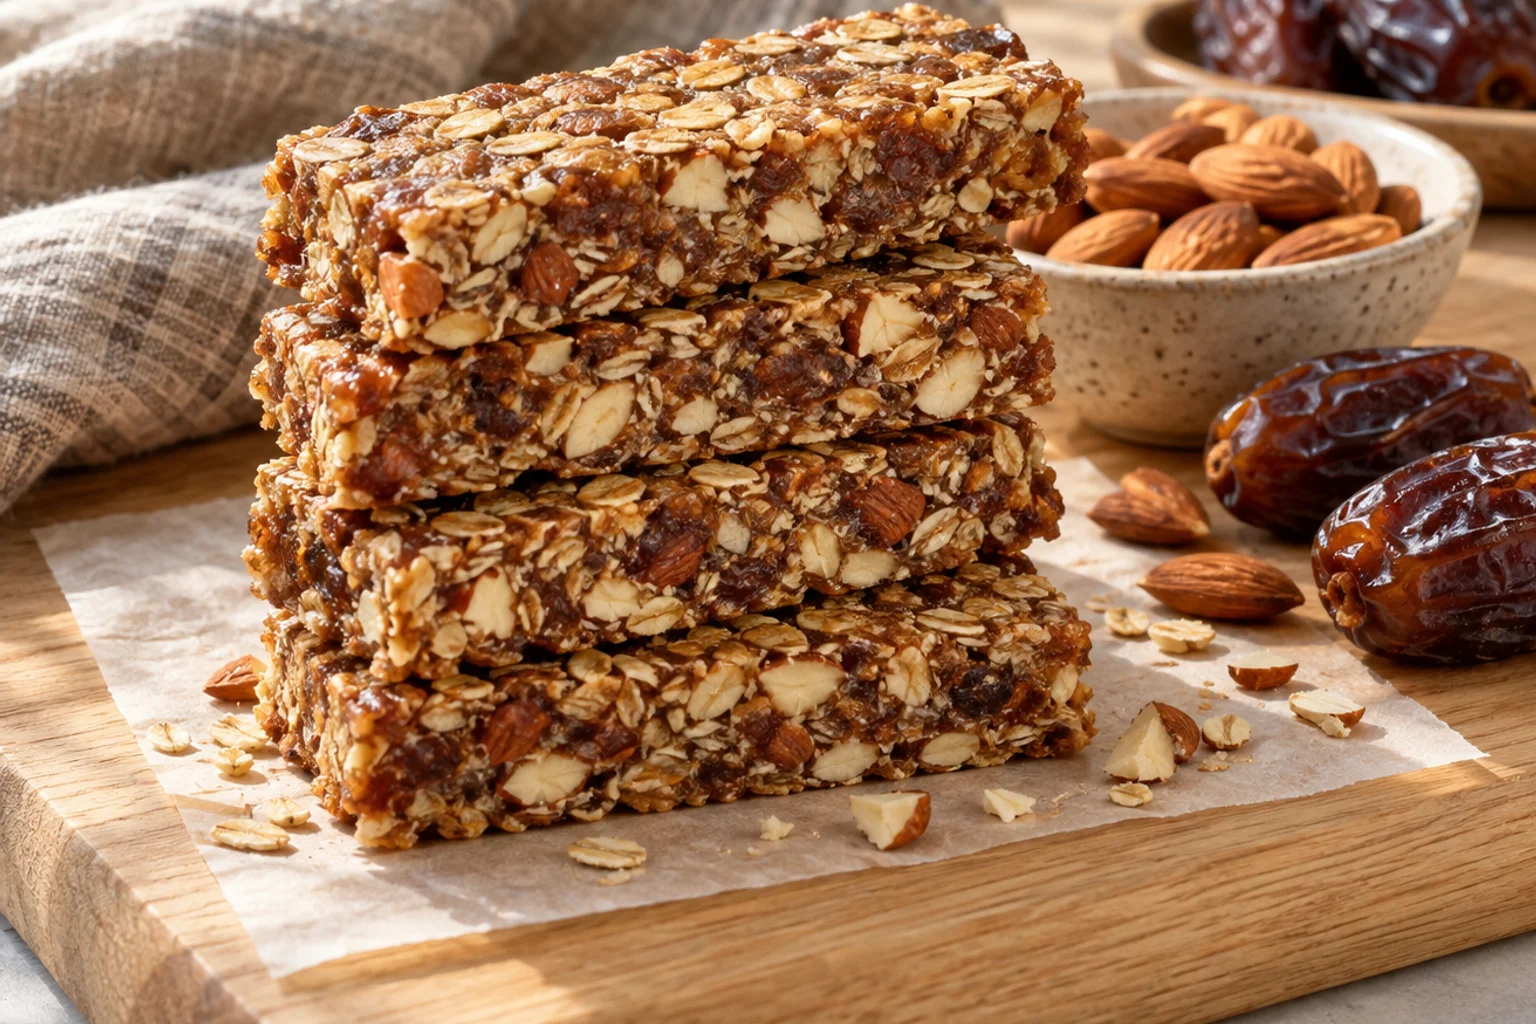
Recipe · Medium · vegan, dairy-free
Date-Sweetened Almond Butter Bars
Chewy vegan protein bars with 10 g protein per bar, bound with Medjool dates and almond butter.
- Prep
- 20 min
- Cook
- 0 min
- Chill/set
- 45 min
- Total
- 1 hr 5 min
- Makes
- 12 bars
- Protein
- 10g
- Calories
- 210
- Carbs
- 27g
- Fat
- 9g
- Fiber
- 4g
- Sodium
- 35mg
Per serving, approximate.
Ingredients
- 12 Medjool dates (about 290 g), pitted dates; soak 10 minutes in warm water if hard, then drain (shop at Amazon, opens in a new tab)
- 1/2 cup (130 g) almond butter, well stirred (shop at Amazon, opens in a new tab)
- 2/3 cup (80 g) unflavored or vanilla plant protein blend (shop at Amazon, opens in a new tab)
- 1 cup (90 g) old-fashioned rolled oats (shop at Amazon, opens in a new tab)
- 1/3 cup (45 g) raw almonds, roughly chopped (shop at Amazon, opens in a new tab)
- 1 tsp ground cinnamon (shop at Amazon, opens in a new tab)
- 1 tsp pure vanilla extract (shop at Amazon, opens in a new tab)
- 1/4 tsp kosher salt (shop at Amazon, opens in a new tab)
- 2 to 4 tbsp water, as needed
Equipment
Steps
- Line an 8x8-inch pan with parchment, leaving two sides overhanging.
- Process the dates, almond butter, vanilla and salt in a food processor for about 1 minute, scraping the bowl, until a thick paste forms.
- Add the plant protein, oats and cinnamon and pulse 10 to 15 times until a crumbly dough forms. Add water 1 tablespoon at a time and pulse until the dough clumps when pressed; plant powder usually needs 2 to 4 tablespoons.
- Fold in the chopped almonds by hand.
- Press the dough firmly into the pan and smooth the top. Rest 5 minutes, then check that it holds when pressed; if it crumbles, sprinkle in 1 more tablespoon of water and press again.
- Freeze 45 minutes, lift out and cut into 12 bars with a hot knife.
Storage: Fridge 2 weeks, wrapped individually; freezer up to 3 months.
Nut-free sunflower seed butter balls
Schools often restrict peanuts and tree nuts, and sunflower seed butter is the usual substitute. These balls use sunflower seed butter (shop at Amazon, opens in a new tab) and hemp hearts (shop at Amazon, opens in a new tab). Always read labels: some oats, chocolate chips and powders are made on shared equipment with nuts, and a "may contain" warning matters for a school snack. Honey should not be given to children under 12 months.
Recipe · Easy · vegetarian, nut-free
Nut-Free Sunflower Seed Butter Protein Balls
School-safe nut-free protein balls with 11 g protein per serving, made with sunflower seed butter, oats, hemp hearts and vanilla whey.
- Prep
- 15 min
- Cook
- 0 min
- Chill/set
- 30 min
- Total
- 45 min
- Makes
- 8 servings (3 balls each, 24 balls total)
- Protein
- 11g
- Calories
- 245
- Carbs
- 24g
- Fat
- 13g
- Fiber
- 3g
- Sodium
- 140mg
Per serving, approximate.
Ingredients
- 1 cup (90 g) old-fashioned rolled oats (use a nut-free brand) (shop at Amazon, opens in a new tab)
- 3/4 cup (45 g) vanilla whey protein isolate (about 1.5 scoops) (shop at Amazon, opens in a new tab)
- 1/2 cup (130 g) sunflower seed butter, well stirred (shop at Amazon, opens in a new tab)
- 1/4 cup (85 g) honey (shop at Amazon, opens in a new tab)
- 3 tbsp (30 g) hemp hearts (shop at Amazon, opens in a new tab)
- 1/4 cup (45 g) mini chocolate chips (check the label for nut-free) (shop at Amazon, opens in a new tab)
- 2 tbsp (30 ml) milk, plus more by the teaspoon (shop at Whole Foods, opens in a new tab)
- 1/4 tsp kosher salt (shop at Amazon, opens in a new tab)
Equipment
Steps
- Stir the oats, whey, hemp hearts and salt together in a large bowl.
- Add the sunflower seed butter, honey and milk. Stir hard for 2 minutes; the dough should be thick and slightly sticky. Add milk 1 teaspoon at a time if it is dry, or 1 tablespoon oats if it is wet.
- Fold in the chocolate chips and rest the bowl for 5 minutes.
- Scoop level tablespoons, roll between damp palms and set on a parchment-lined tray. You should get about 24 balls.
- Chill 30 minutes before packing.
Storage: Fridge 1–2 weeks; freezer up to 3 months. Pack with a cold pack for school.
Sunflower butter can have a slightly bitter, roasted flavor. A teaspoon of vanilla and a pinch of salt balance it, and the chocolate chips do the rest.
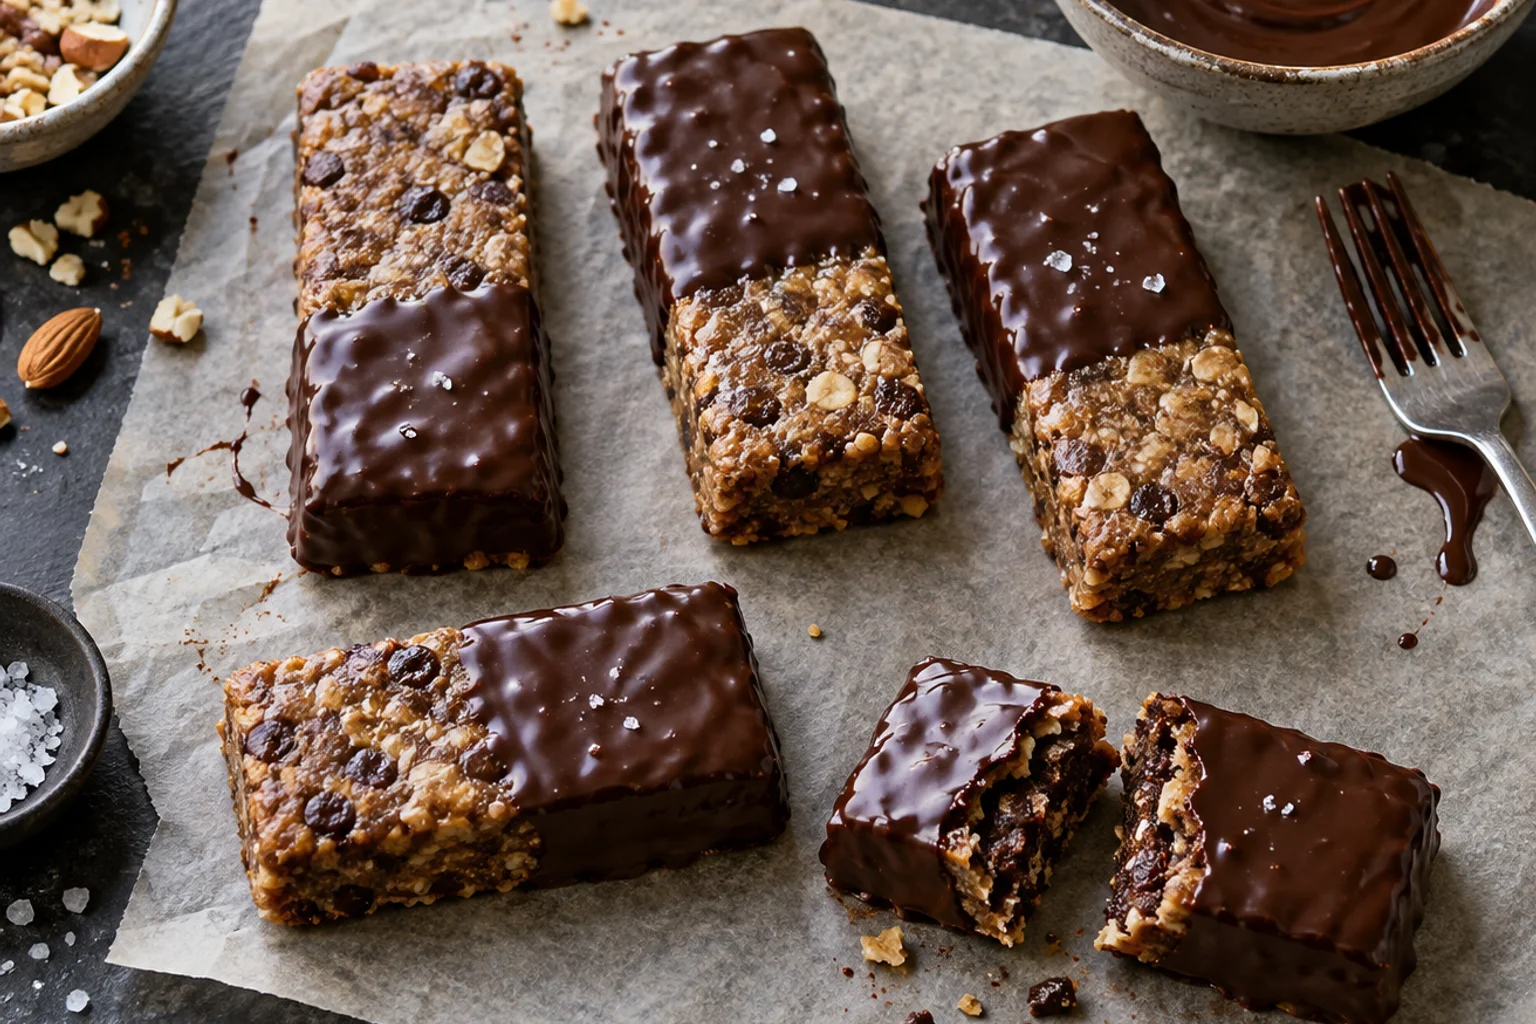
Chocolate-dipped protein bars
This bar combines almond butter, chocolate whey and a thin chocolate shell for a candy-bar finish. The shell adds roughly 45 calories per bar and makes the bar easier to hold at room temperature. Melt the chocolate in short microwave bursts so it stays glossy.
Recipe · Medium · vegetarian
Chocolate-Dipped Protein Bars
Fudgy almond butter chocolate bars with 13 g protein per bar and a thin, snappy dark chocolate shell.
- Prep
- 20 min
- Cook
- 3 min
- Chill/set
- 1 hr
- Total
- 1 hr 23 min
- Makes
- 10 bars
- Protein
- 13g
- Calories
- 240
- Carbs
- 27g
- Fat
- 11g
- Fiber
- 3g
- Sodium
- 100mg
Per serving, approximate.
Ingredients
- 1 1/4 cups (115 g) old-fashioned rolled oats (shop at Amazon, opens in a new tab)
- 1 cup (100 g) chocolate whey protein powder (about 3 scoops) (shop at Amazon, opens in a new tab)
- 1/2 cup (130 g) almond butter, well stirred (shop at Amazon, opens in a new tab)
- 1/3 cup (113 g) honey (shop at Amazon, opens in a new tab)
- 1/4 cup (60 ml) milk, plus more by the teaspoon (shop at Whole Foods, opens in a new tab)
- 1/4 tsp kosher salt (shop at Amazon, opens in a new tab)
- 1/2 cup (90 g) dark chocolate chips, for the shell (shop at Amazon, opens in a new tab)
- 1 tsp neutral oil, optional, for a thinner shell
Equipment
Steps
- Line an 8x8-inch pan with parchment, leaving two sides overhanging. Pulse the oats 5 to 6 times in a food processor so about half are chopped.
- Stir the oats, chocolate whey and salt together in a large bowl. Warm the almond butter and honey for 20 seconds, then pour over the dry mix and add the milk.
- Stir hard, then knead with damp hands for 1 minute. Add milk 1 teaspoon at a time if it is crumbly.
- Press firmly into the pan, smooth the top, and freeze 45 minutes until firm.
- Lift out the slab and cut into 10 bars with a hot knife, then return the bars to the freezer on a parchment-lined sheet pan while you melt the chocolate.
- Melt the chocolate chips with the oil in the microwave at 50 percent power in 30-second bursts, stirring each time, for about 1 to 2 minutes total until smooth.
- Dip each bar halfway or drizzle with a fork, tap off the excess, and set on parchment. Chill 15 minutes until the shell is hard.
Storage: Fridge 1–2 weeks, wrapped individually; freezer up to 3 months.
Dip the bars cold. A frozen bar sets the chocolate in seconds and gives you a thin shell, while a room-temperature bar lets the chocolate run off.
How do you get 15–20 grams of protein per homemade protein bar?
A homemade protein bar reaches 15–20 g protein when you add more whey or casein, swap cereal for protein crisps, or cut the same pan into fewer, larger bars. The base peanut butter bar already has about 15 g. Each change trades a little texture, so go in steps.
For context, the site's healthy protein snack method scores a serving on 10 g or more protein, under 200 kcal, 5 g or less total sugar, 3 g or more fiber and under 400 mg sodium, ranked by g protein per 100 calories (see how to choose a healthy protein snack). The 15–20 g here is a target for homemade bars, and most bars in this article run 210–250 kcal, so they trade some calories for protein.
- Add powder, then binder. Each extra 10 g of whey adds about 8 g protein across the batch, or roughly 0.7 g per bar if you cut 12 bars. Offset it with 1–2 teaspoons more milk per 10 g.
- Use protein crisps in place of cereal. Swapping crisp rice cereal for whey crisps in the crispy bars adds roughly 20 g protein across the pan.
- Swap oats for powdered peanut butter. Powdered PB has roughly half the calories and far less fat than regular peanut butter per tablespoon. Replace up to 30 g of the oats with it.
- Cut fewer, larger bars. Cutting the same pan into 8 instead of 12 raises each bar to 1.5 times the protein and the calories.
Check the math with the label on your powder. Real powders range from about 70 to 90 percent protein by weight, so a "scoop" can mean 20–27 g protein. Nutrition values here are estimates calculated from USDA FoodData Central entries for the listed ingredients and typical label data, so treat them as close, not exact. If you have kidney disease or any condition that affects how much protein you can eat, check with your doctor before pushing intake up. For help setting a per-snack target, see how much protein should a snack have.
How do you shape protein balls and cut clean bars?
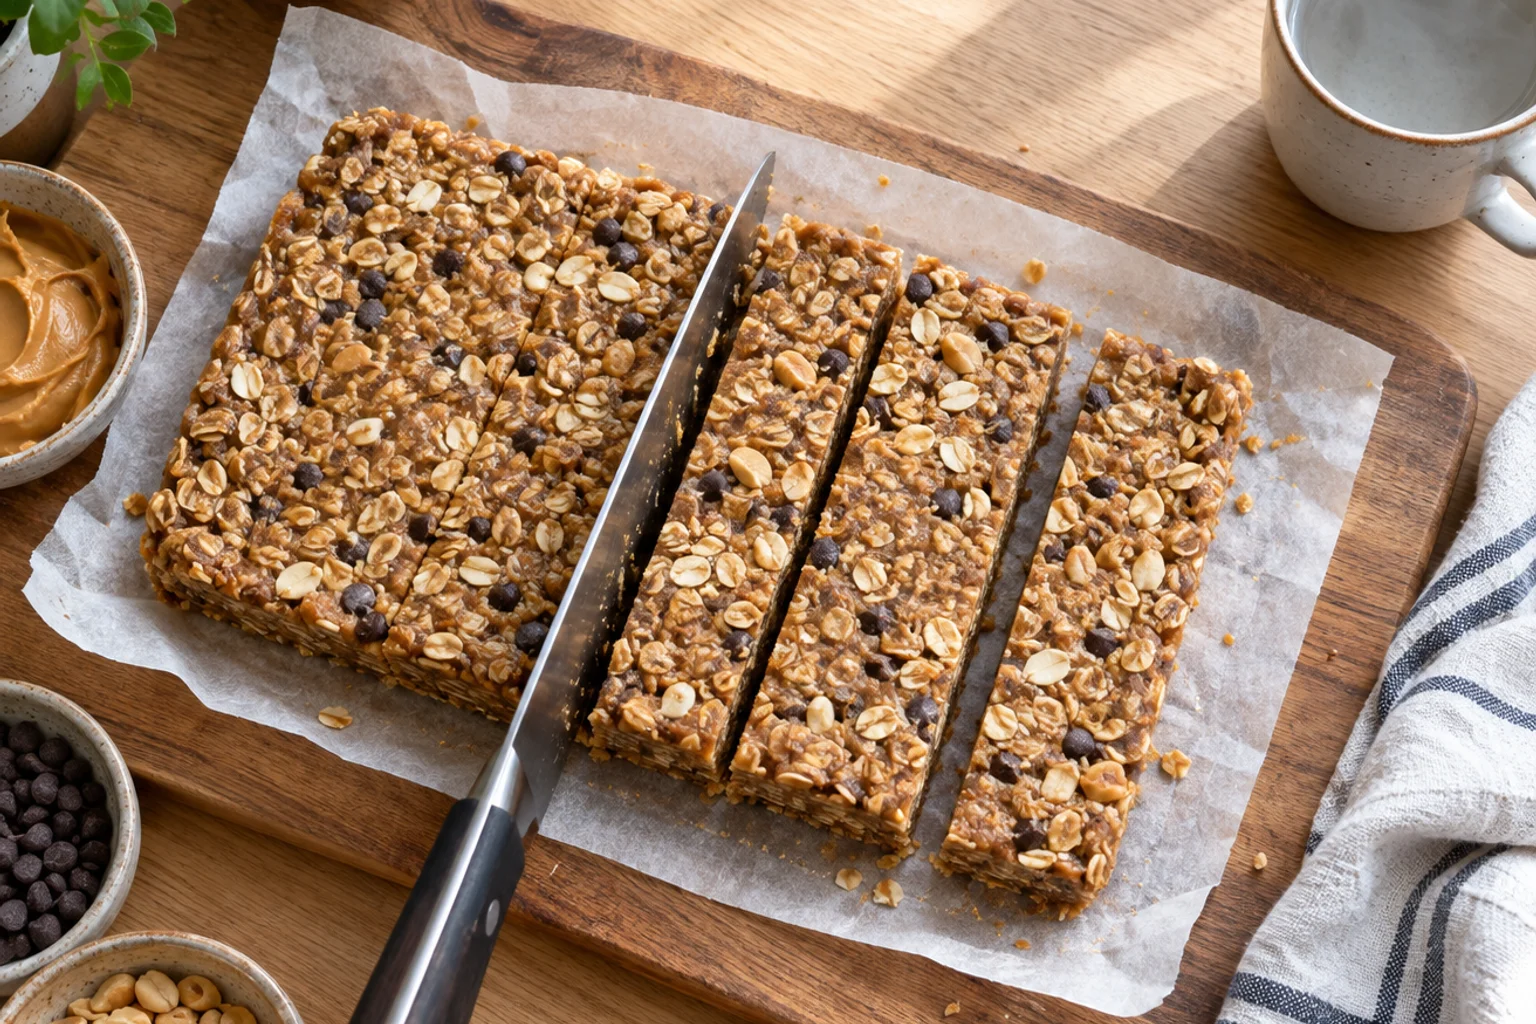
Protein balls come out even when you portion the dough with a 1-tablespoon cookie scoop, rest it 5 minutes and roll it between damp palms. Bars cut cleanly when the slab is cold and the knife is hot, so chill the pan until firm, then slice in one downward motion.
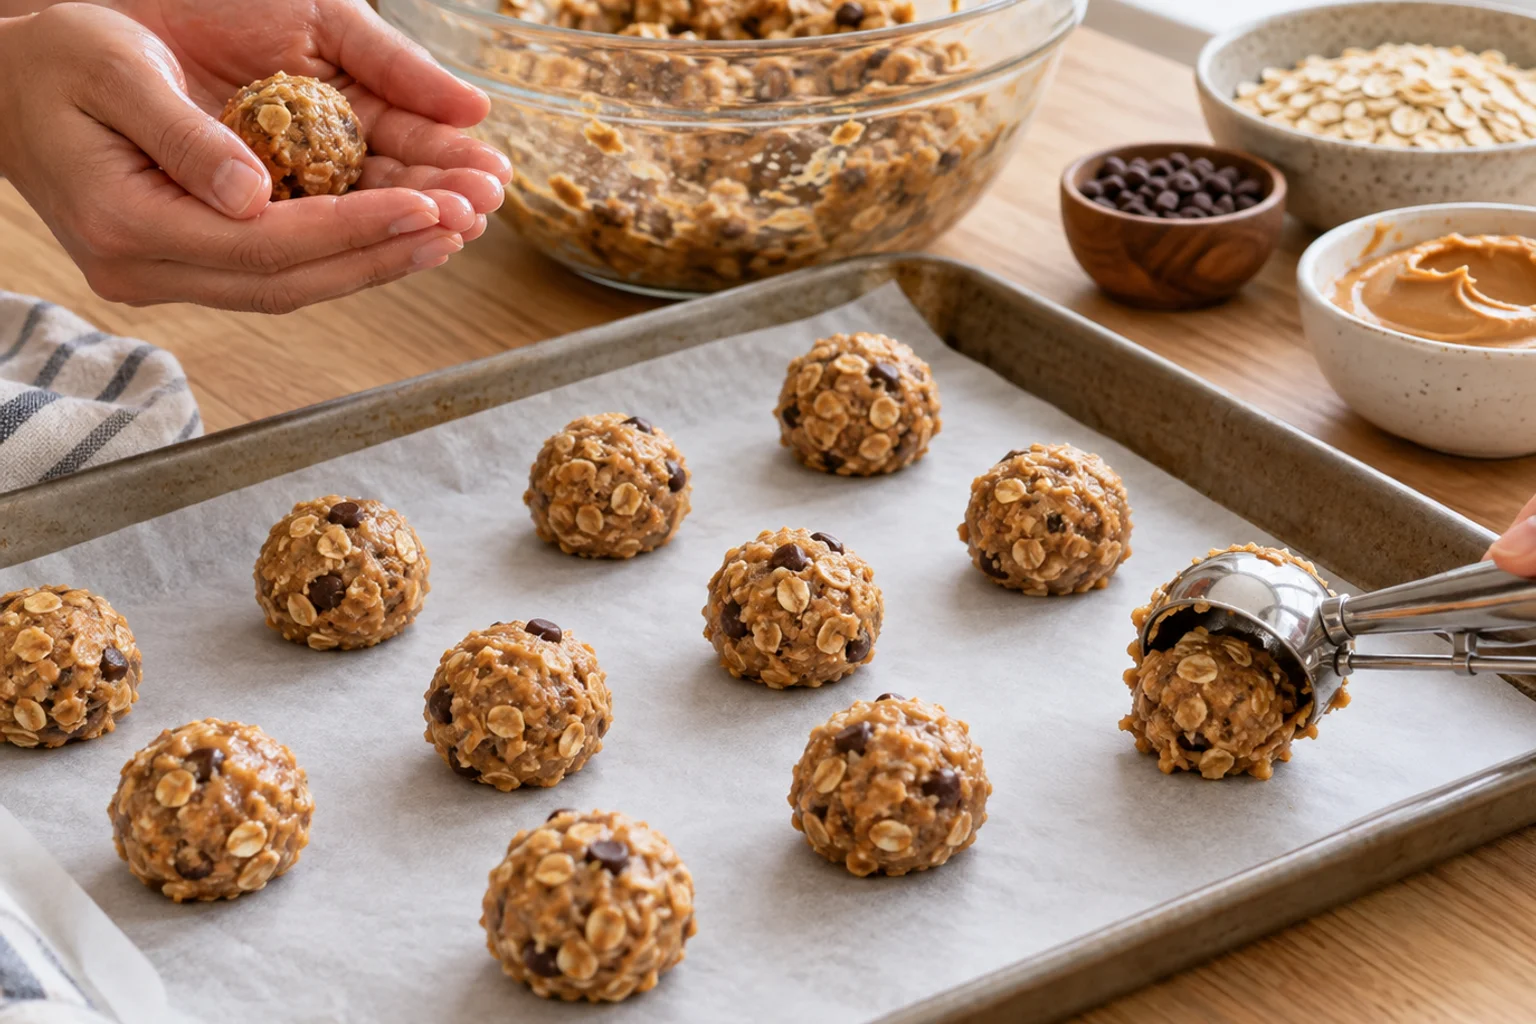
- Scooping and then lightly rolling gives balls of equal size. Equal size means the nutrition per serving is what you calculated.
- Keep a bowl of water nearby. Wet your palms, shake off the drops, and roll. If dough still sticks, chill the whole bowl 10 minutes.
- Press with a flat tool. The bottom of a measuring cup or glass compresses the mix far more evenly than fingers, and loose bars fall apart when cut.
- Run a chef's knife (shop at Amazon, opens in a new tab) under hot water for 10 seconds, dry it, and slice with one downward motion. Wipe and reheat between cuts. Cold bars cut cleanly; room-temperature bars smear and crumble.
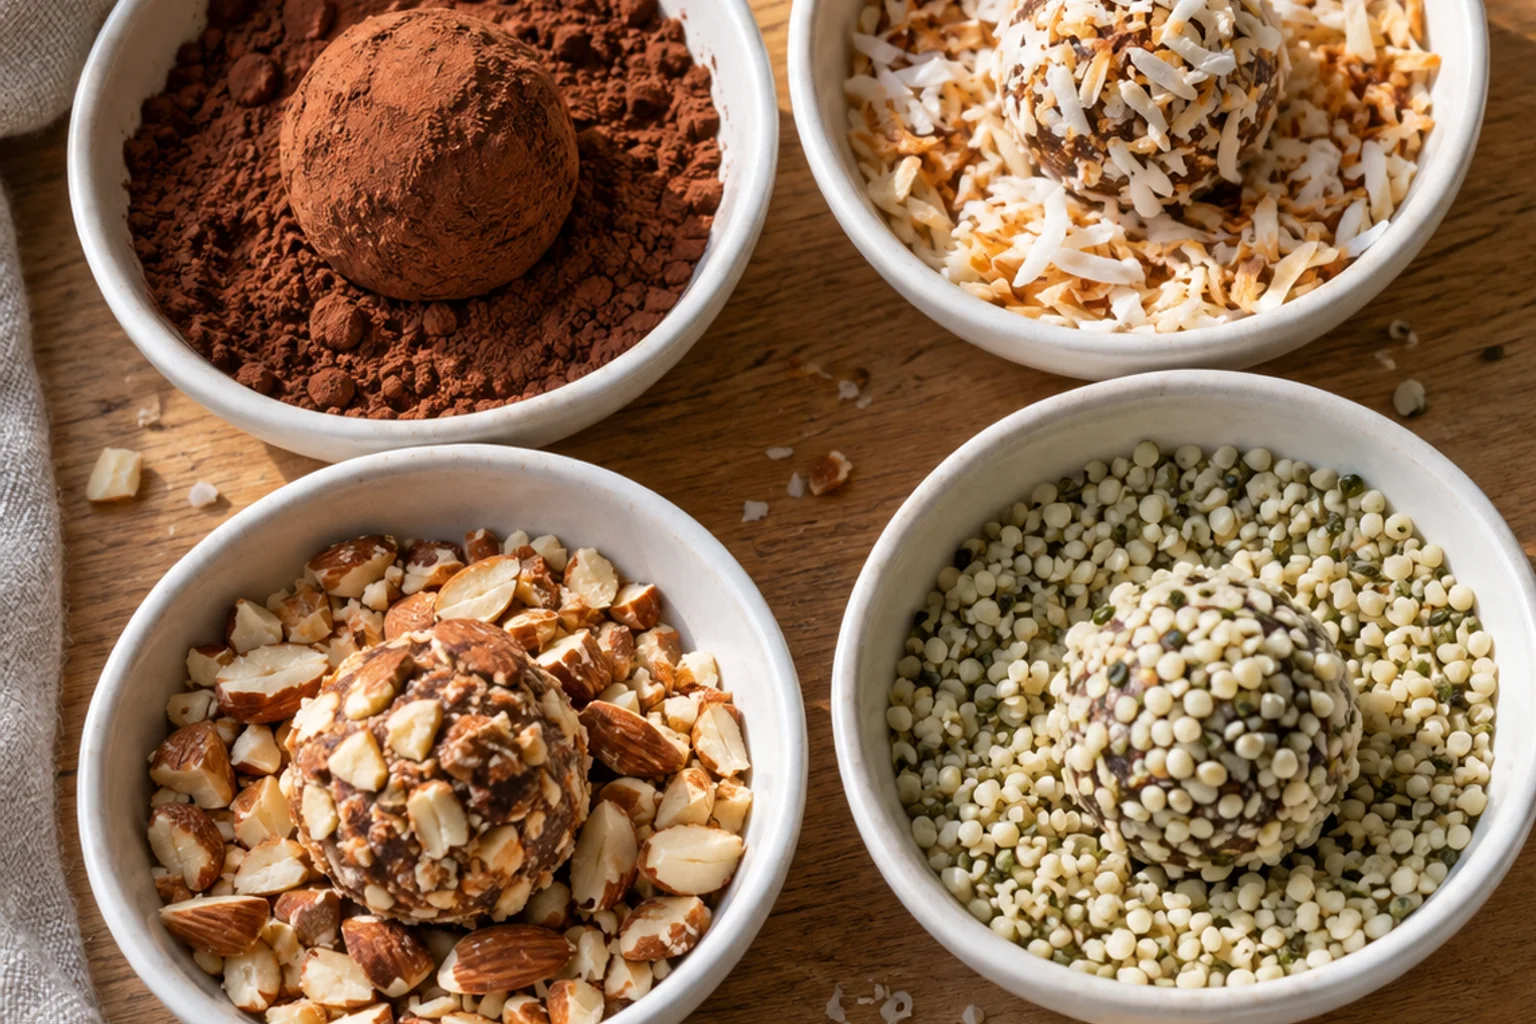
Coating ideas for protein energy bites
A coating changes the flavor of the same dough and stops balls sticking to each other. Pour about 1/4 cup of coating into a shallow dish, roll each ball, and press lightly.
- Shredded coconut (shop at Amazon, opens in a new tab), toasted for 3 minutes in a dry pan, goes well with chocolate and peanut butter.
- Unsweetened cocoa powder (shop at Amazon, opens in a new tab) gives a truffle look and a bitter edge. Mix in 1 teaspoon of powdered sugar substitute if you want it sweeter.
- Finely chopped almonds (shop at Amazon, opens in a new tab) or walnuts (shop at Amazon, opens in a new tab) add crunch.
- Crushed freeze-dried berries make pink balls with a tart flavor.
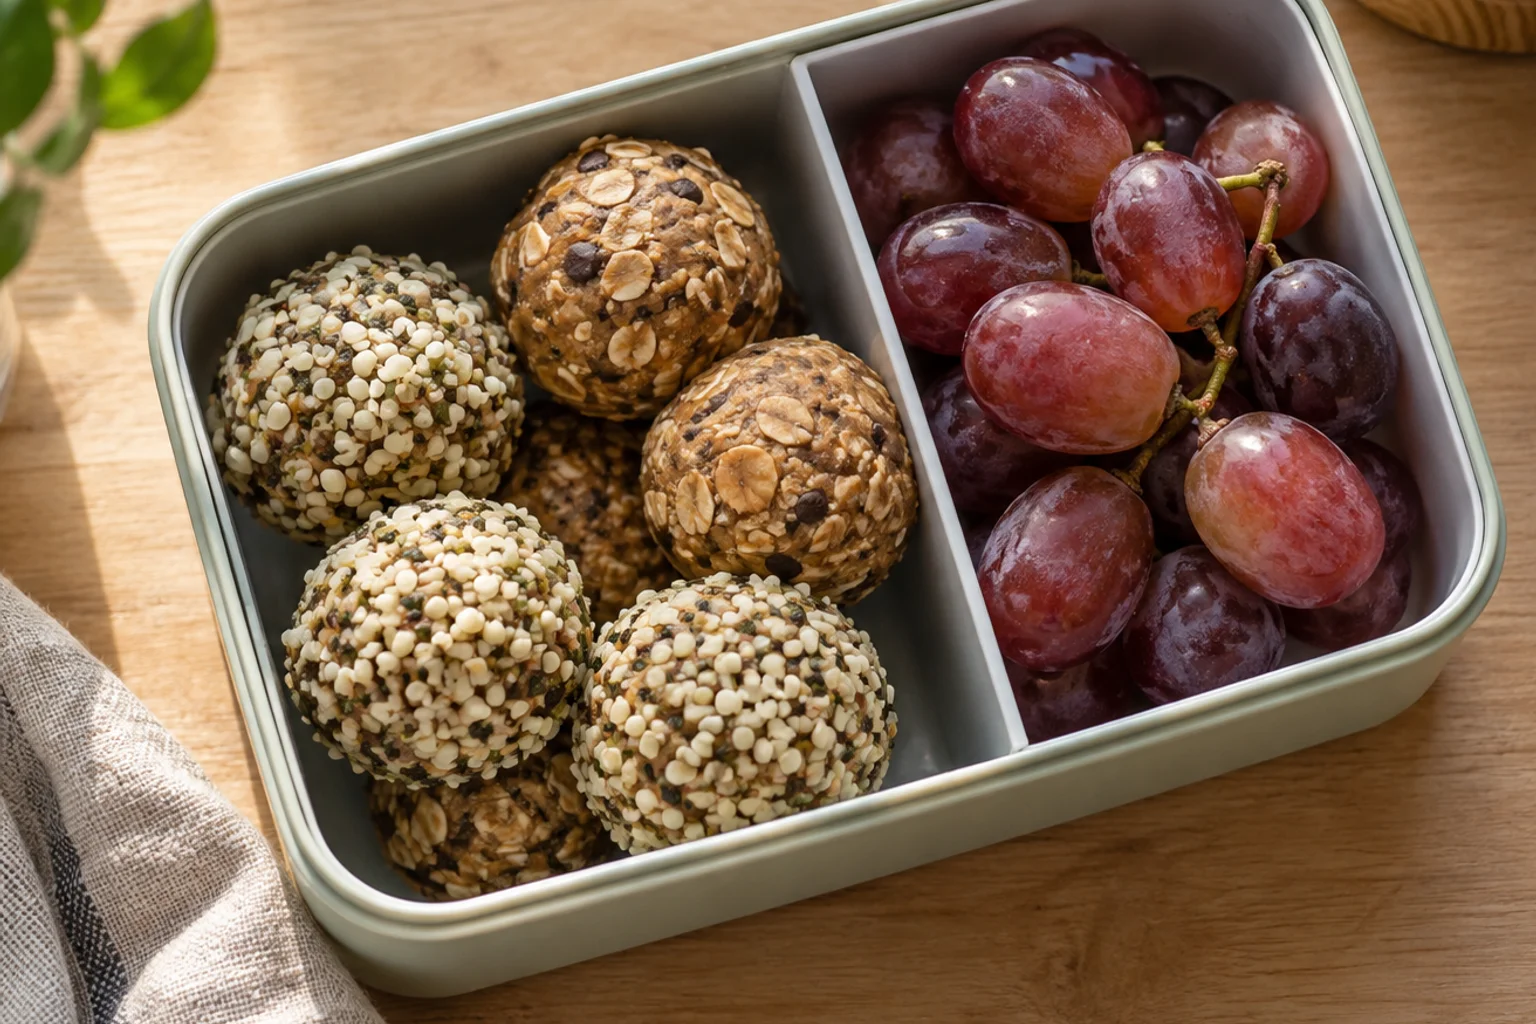
How do you make protein balls nut-free, vegan or oat-free?
Protein balls go nut-free with sunflower seed butter and hemp hearts, vegan with pea protein and maple syrup, and gluten-free with certified gluten-free oats. Keep the replacement's weight the same as the original, then adjust by the teaspoon, because every swap changes how much liquid the dough absorbs.
| If you need to avoid | Swap | Notes |
|---|---|---|
| Peanuts | Sunflower seed butter, almond butter or tahini | Sunflower butter is nut-free; tahini is more bitter, so add extra sweetener |
| All tree nuts and peanuts | Sunflower seed butter, hemp hearts, pumpkin seeds | Check labels on oats, chips and powder for shared-equipment warnings |
| Dairy (whey, casein, milk) | Pea or plant protein blend, plant milk | Expect to add 1–3 tablespoons more binder or liquid |
| Honey (vegan, or infants under 1 year) | Pure maple syrup or date paste | Maple is thinner, so use about 10 percent less or add 1 tablespoon more oats |
| Gluten | Certified gluten-free rolled oats and oat flour | Regular oats are often cross-contaminated with wheat |
| Oats | Almond flour in the same weight | The dough turns softer and richer, so chill it 10–15 minutes longer |
| Refined sugar | Date paste, or a little monk fruit sweetener | Monk fruit adds sweetness but no binding, so keep the sticky syrup or dates |
| Soy | Choose crisps and powders without soy | Many protein crisps are soy-based; check the label |
For more vegan recipes, see plant-based protein snacks to make. For an allergy-safe kitchen, wash bowls and scoops with hot soapy water first and read every label, every time, because formulas change. Food Allergy Research & Education (FARE) has current guidance on labeling and cross-contact.
How long do protein balls last, and can you freeze them?
Protein balls last 1–2 weeks in an airtight container in the fridge at or below 40°F (4°C) and up to 3 months in the freezer at 0°F (−18°C). Yes, you can freeze protein balls: freeze them on a tray for 30 minutes, then bag them, and thaw overnight in the fridge. Homemade protein bars follow the same limits.
No-bake snacks have no preservatives and contain moisture from honey, nut butter and milk, so treat them as perishable. A simple rule: keep what you will finish within a week in the fridge, and freeze the rest the day you make it. Crispy bars lose their crunch after about 1 week in the fridge.
- In the fridge, layer balls between parchment so they do not fuse, and wrap bars individually.
- In the freezer, freeze balls on a tray for 30 minutes first so they do not clump, then bag them. Freeze bars individually wrapped in parchment, then bagged in freezer bags (shop at Amazon, opens in a new tab). Freezing keeps food safe indefinitely, so the 3-month limit is about quality.
- Label each bag with the date and flavor using a freezer marker and labels (shop at Amazon, opens in a new tab).
- To thaw, move a bar or a few balls to the fridge the night before, or leave them on the counter for 15–20 minutes. Bars with a chocolate shell thaw best in the fridge, which avoids condensation spots.
- USDA calls 40–140°F (4–60°C) the danger zone, where bacteria multiply fastest. Keep perishable snacks out of the fridge no more than 2 hours, or 1 hour above 90°F (32°C).
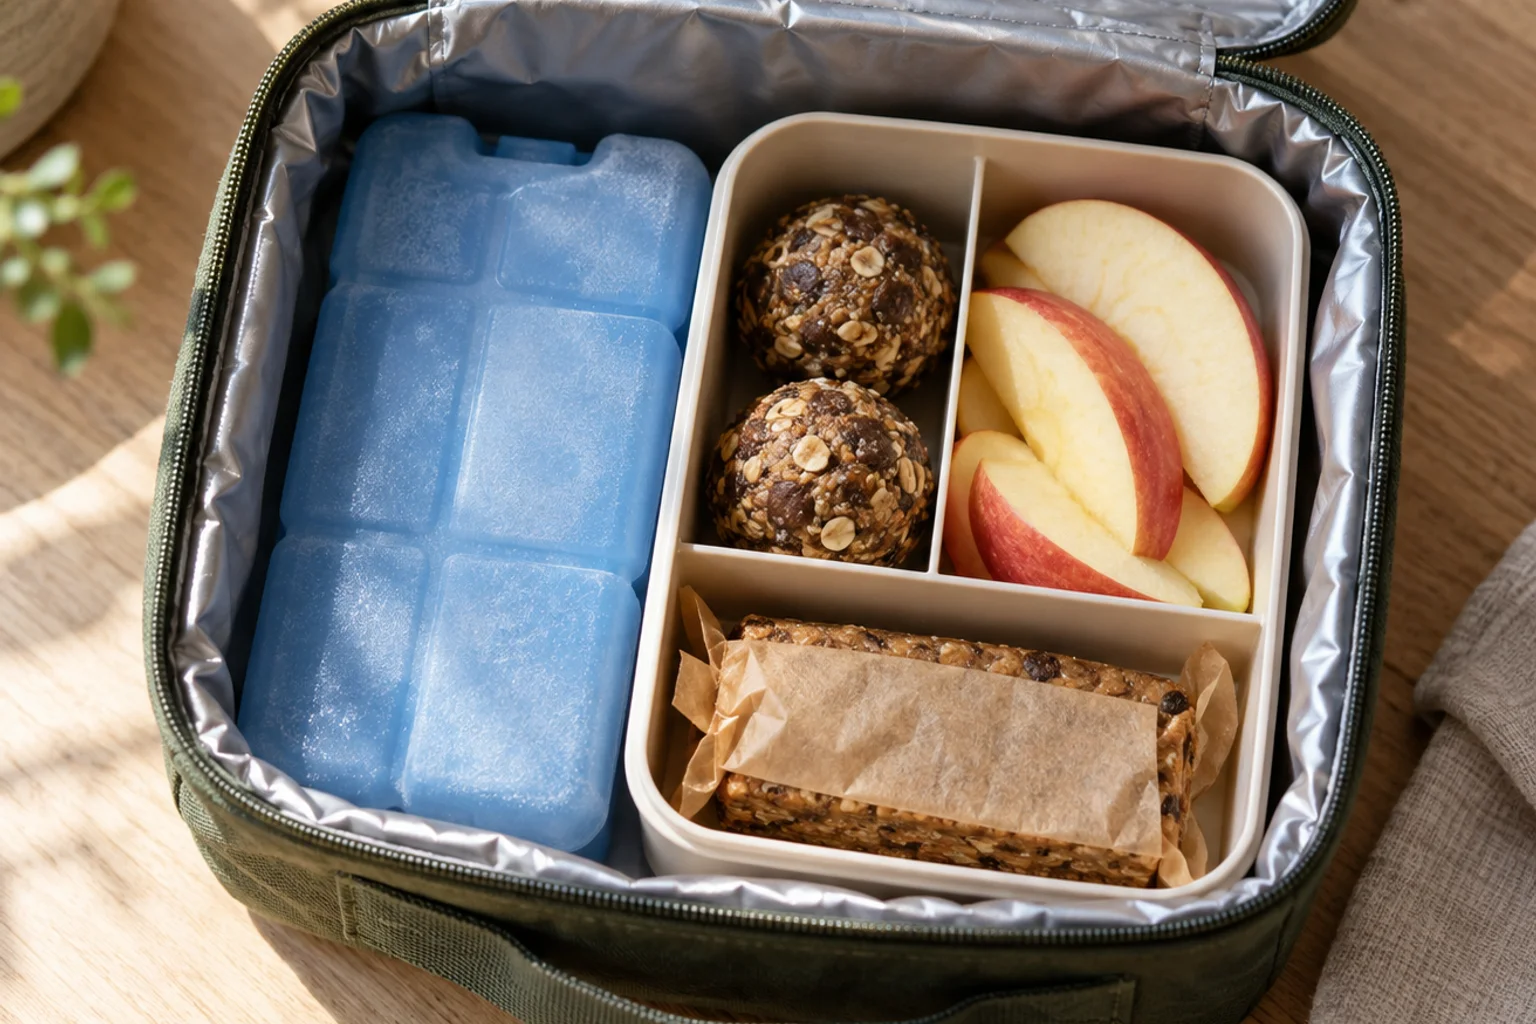
To carry snacks to the gym or school without melting them, wrap bars in parchment and pack them in a bento snack box (shop at Amazon, opens in a new tab) inside an insulated snack bag (shop at Amazon, opens in a new tab) with an ice pack. Chocolate-coated bars soften first, so choose a firm ball or a crispy bar on hot days.
For container choices, thaw timing and a weekly prep plan, see fridge and freezer storage for protein snacks.
Are homemade protein bars cheaper than store-bought?
Homemade protein bars cost about $0.75–$1.60 each, compared with $1.50–$4.00 for store-bought bars, and protein balls cost about $0.35–$0.80 each. A 12-bar batch of the peanut butter bars costs about $9–$16 in ingredients. These are rough ranges that depend heavily on your protein powder and nut butter, not exact prices.
| Snack | Rough cost per piece | Protein per piece (g) |
|---|---|---|
| Homemade protein ball | $0.35–$0.80 | 4–6 |
| Homemade protein bar | $0.75–$1.60 | 10–15 |
| Store-bought protein bar (supermarket) | $1.50–$3.00 | 15–20 |
| Store-bought premium or "clean" bar | $2.50–$4.00 | 10–20 |
Buying powder and nut butter in larger sizes pulls the cost down further. The tradeoff is time: a batch takes 15–20 minutes of work. Store-bought bars are more shelf-stable at room temperature, so keep a couple in the car for days you cannot refrigerate. Homemade wins on ingredients you choose, such as no sugar alcohols and no gums.
Compare homemade with store-bought on protein per 100 calories as well as price. The protein-per-100-calories article shows how to run that comparison, and post-workout protein snacks explains when a bar with 15–20 g protein makes sense.
How do you batch-prep protein balls and bars?
A batch-prep session makes one ball recipe and one bar recipe in under an hour of hands-on time: scoop the balls while the bars freeze, then cut and wrap everything. That gives about 16 balls and 12 bars for the week.
To scale up, double or triple the weights rather than the cups, mix in a large bowl, and chill the balls on two sheet pans so they firm quickly. Portion into freezer bags of 4–6 balls or 2 bars, so you thaw only what you will eat. Freeze half so you are not eating the same snack all week. Pair either with a build-your-own snack combo like Greek yogurt or fruit when you need more protein or volume.
Shop this article
39 ingredients and tools. Add them to your list, then send it to Amazon, Whole Foods or Instacart.
Protein powders
- Whey protein isolate (unflavored or vanilla)Amazon (opens in a new tab)Whole Foods (opens in a new tab)Instacart (opens in a new tab)
- Micellar casein protein powderAmazon (opens in a new tab)Whole Foods (opens in a new tab)Instacart (opens in a new tab)
- Pea protein isolateAmazon (opens in a new tab)Whole Foods (opens in a new tab)Instacart (opens in a new tab)
- Plant protein blend (pea + rice)Amazon (opens in a new tab)Whole Foods (opens in a new tab)Instacart (opens in a new tab)
- Powdered peanut butterAmazon (opens in a new tab)Whole Foods (opens in a new tab)Instacart (opens in a new tab)
- Chocolate whey protein powderAmazon (opens in a new tab)Whole Foods (opens in a new tab)Instacart (opens in a new tab)
Eggs & dairy
- Milk (or ultra-filtered milk)Whole Foods (opens in a new tab)Instacart (opens in a new tab)
Nuts, seeds & nut butters
- Natural peanut butter (peanuts + salt)Amazon (opens in a new tab)Whole Foods (opens in a new tab)Instacart (opens in a new tab)
- Almond butterAmazon (opens in a new tab)Whole Foods (opens in a new tab)Instacart (opens in a new tab)
- Raw almondsAmazon (opens in a new tab)Whole Foods (opens in a new tab)Instacart (opens in a new tab)
- Sunflower seed butter (nut-free)Amazon (opens in a new tab)Whole Foods (opens in a new tab)Instacart (opens in a new tab)
- Hemp hearts (shelled hemp seeds)Amazon (opens in a new tab)Whole Foods (opens in a new tab)Instacart (opens in a new tab)
- Walnut halvesAmazon (opens in a new tab)Whole Foods (opens in a new tab)Instacart (opens in a new tab)
Oats, grains & binders
- Oat flourAmazon (opens in a new tab)Whole Foods (opens in a new tab)Instacart (opens in a new tab)
- Old-fashioned rolled oatsAmazon (opens in a new tab)Whole Foods (opens in a new tab)Instacart (opens in a new tab)
- Whey or soy protein crispsAmazon (opens in a new tab)Whole Foods (opens in a new tab)Instacart (opens in a new tab)
- Crisp rice cerealAmazon (opens in a new tab)Whole Foods (opens in a new tab)Instacart (opens in a new tab)
- Unsweetened shredded coconutAmazon (opens in a new tab)Whole Foods (opens in a new tab)Instacart (opens in a new tab)
Sweeteners & chocolate
- HoneyAmazon (opens in a new tab)Whole Foods (opens in a new tab)Instacart (opens in a new tab)
- Dark chocolate chips (60%+)Amazon (opens in a new tab)Whole Foods (opens in a new tab)Instacart (opens in a new tab)
- Pure vanilla extractAmazon (opens in a new tab)Whole Foods (opens in a new tab)Instacart (opens in a new tab)
- Pure maple syrupAmazon (opens in a new tab)Whole Foods (opens in a new tab)Instacart (opens in a new tab)
- Freeze-dried berriesAmazon (opens in a new tab)Whole Foods (opens in a new tab)Instacart (opens in a new tab)
- Unsweetened cocoa powderAmazon (opens in a new tab)Whole Foods (opens in a new tab)Instacart (opens in a new tab)
- Medjool datesAmazon (opens in a new tab)Whole Foods (opens in a new tab)Instacart (opens in a new tab)
Sauces, spices & flavor
Kitchen tools
- Digital kitchen scale (grams)Amazon (opens in a new tab)Instacart (opens in a new tab)
- Cookie scoop (1 tablespoon)Amazon (opens in a new tab)Instacart (opens in a new tab)
- Parchment paperAmazon (opens in a new tab)Whole Foods (opens in a new tab)Instacart (opens in a new tab)
- Rimmed half-sheet pansAmazon (opens in a new tab)Instacart (opens in a new tab)
- Instant-read meat thermometerAmazon (opens in a new tab)Instacart (opens in a new tab)
- 8x8-inch baking panAmazon (opens in a new tab)Instacart (opens in a new tab)
- Sharp chef's knife or slicing knifeAmazon (opens in a new tab)Instacart (opens in a new tab)
- Food processorAmazon (opens in a new tab)Instacart (opens in a new tab)
Storage & preserving supplies
- Zip-top freezer bagsAmazon (opens in a new tab)Whole Foods (opens in a new tab)Instacart (opens in a new tab)
- Freezer labels and markerAmazon (opens in a new tab)Instacart (opens in a new tab)
- Leak-proof bento snack boxAmazon (opens in a new tab)Instacart (opens in a new tab)
- Insulated snack bag with ice packAmazon (opens in a new tab)Instacart (opens in a new tab)
Frequently asked questions
How many scoops of protein powder do I need for protein balls?
Use 2 scoops (about 60 g) of whey for a 16-ball batch built on 1 cup (90 g) of oats and 1/2 cup (130 g) of peanut butter. That gives about 6 g protein per ball. One scoop gives about 4.5 g and three scoops about 7.5 g, but each extra scoop needs a little more milk.
Do protein balls need to be refrigerated?
Yes, because they contain milk, honey and nut butter. Keep protein balls in an airtight container at or below 40°F (4°C) for 1 to 2 weeks, and do not leave them out longer than 2 hours, or 1 hour above 90°F (32°C). Freeze extras for up to 3 months.
Can you make protein balls without protein powder?
Yes. Oats, nut butter and seeds alone give about 4 to 5 g protein per ball. Add powdered peanut butter, protein crisps, hemp hearts or chopped nuts to raise it. Without powder the dough is denser and more granola-like, and you need less liquid because nothing is absorbing it.
Can I use plant protein powder for protein balls?
Yes. Pea, soy or a pea and rice blend works, but plant powders absorb more liquid than whey. Add 1 to 3 tablespoons more nut butter or milk per batch, rest the dough 10 minutes, and use cocoa, cinnamon or vanilla to cover the earthy taste.
Are protein balls healthy to eat every day?
Protein balls can be a daily snack in moderation. One serving of the recipes here has 8 to 13 g protein and 165 to 255 kcal, plus 10 to 12 g sugar from honey or maple syrup. That is more sugar than the site's 5 g snack limit, so stick to one serving and vary your snacks.
Is edible cookie dough safe without eggs?
Egg-free dough removes the raw egg risk, but raw flour can still carry bacteria such as E. coli. The FDA advises heating flour to 165°F (74°C) before using it uncooked. Heat-treat oat or all-purpose flour in the oven or microwave, check the temperature with a thermometer, cool it completely, then mix.
Can I use almond butter or sunflower butter instead of peanut butter in protein balls?
Yes. Swap peanut butter for almond or sunflower seed butter at the same weight, 130 g per 1/2 cup. Sunflower butter makes the balls nut-free but can taste slightly bitter, so add 1 teaspoon of vanilla and a pinch of salt. Tahini works too; add a little more sweetener.
Sources
- FDA: Handling Flour Safely, What You Need to Know (opens in a new tab)
- USDA FoodData Central (opens in a new tab)
- FoodSafety.gov: Safe Minimum Internal Temperatures and Danger Zone Guidance (opens in a new tab)
- USDA FSIS: Food Safety Basics (opens in a new tab)
- Food Allergy Research & Education (FARE) (opens in a new tab)
More reading on protein, sugar and snack labels is collected on our resources page.